Table of Contents
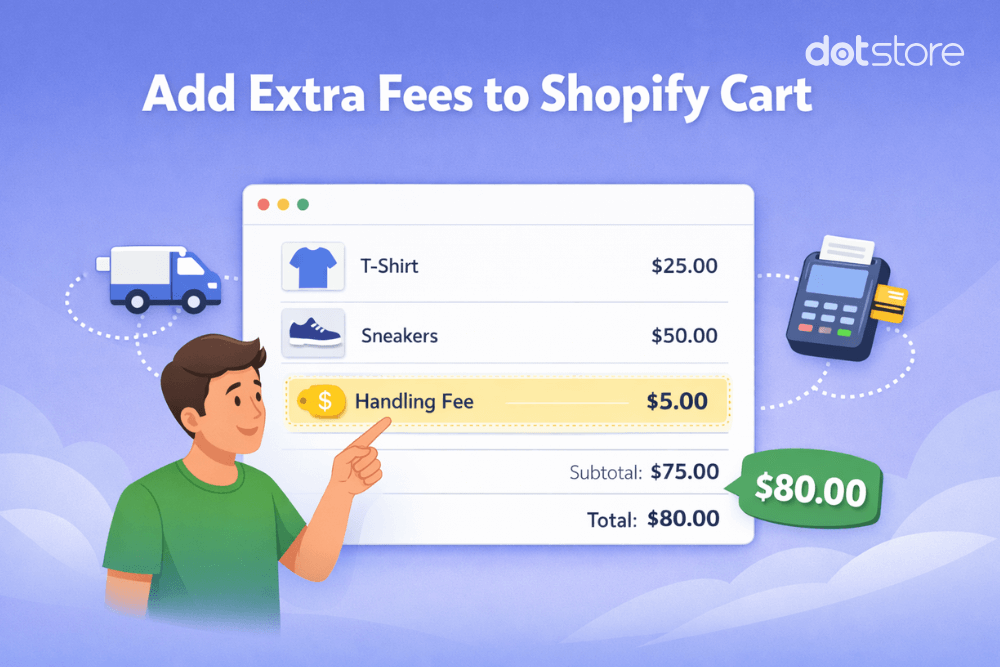
Searching for a way to add extra fees to orders in your Shopify store? In this guide, I’ll show you 3 code-free methods to add fees to the cart in Shopify: using a dedicated app, the native shipping settings, and the Shopify POS tile.
Key Takeaways
- Merchants add fees to the cart in Shopify for a variety of reasons, including recovering packaging and handling costs, offsetting payment processing charges, offering value-added services like gift wrapping, and applying location-based surcharges.
- There are 3 code-free methods to add fees to the cart in Shopify: a dedicated app like The Dotstore’s Extra Fees Manager, the native shipping handling fee settings, and the Shopify POS custom fee tile.
- The Dotstore’s Extra Fees Manager is a powerful app that supports unlimited fees, fixed and percentage-based charges, advanced conditional rules, standalone fee display, built-in scheduling, and multi-currency support.
- Extra Fees Manager is available in a free version (one fee) and a pro version (unlimited fees), and can be installed directly from the Shopify App Store.
Running an ecommerce store means dealing with overhead costs: packaging supplies, payment processing fees, order handling, shipping, and the like.
Absorbing every operating expense will quickly shrink your profit margins. But if you raise base product prices across the board to compensate, you risk losing customers to competitors who seem cheaper at first glance.
A better approach is to add relevant fees to specific carts when appropriate.
And that’s what we’ll cover in this guide. Here, I’ll show you 3 code-free methods to add a fee to the cart in Shopify:
- Using The Dotstore’s Extra Fees Manager app (recommended)
- Using Shopify’s native shipping handling fee settings
- Using the Shopify POS custom fee tile (for in-person sales)
A quick note: Hi! We’re The Dotstore, and we’ve been building ecommerce software since 2009. Our tools now power more than 100,000 websites. Our Extra Fees Manager app is purpose-built to help Shopify merchants add all kinds of custom fees to the cart and checkout — quickly, transparently, and without any coding. It’s available in both free and pro versions. Learn more or get it here.
Shopify Extra Fees Manager
Add dynamic checkout fees for add-ons, upcharges, surcharges, etc., to your Shopify store — the easy way!
14-day, no-questions-asked money-back guarantee.
Let’s get started.
What does it mean to add a fee to the cart in Shopify?
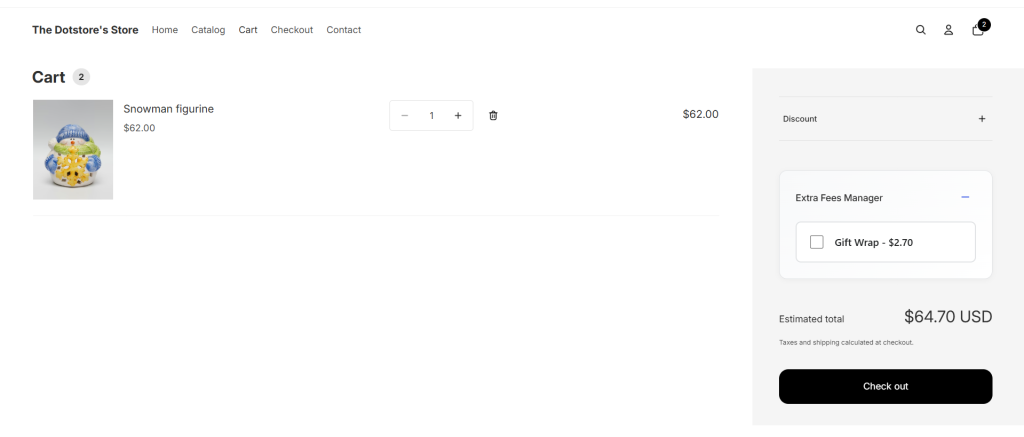
In Shopify, adding a fee to the cart means applying an extra charge to a customer’s order on top of the product subtotal, shipping cost, and taxes.
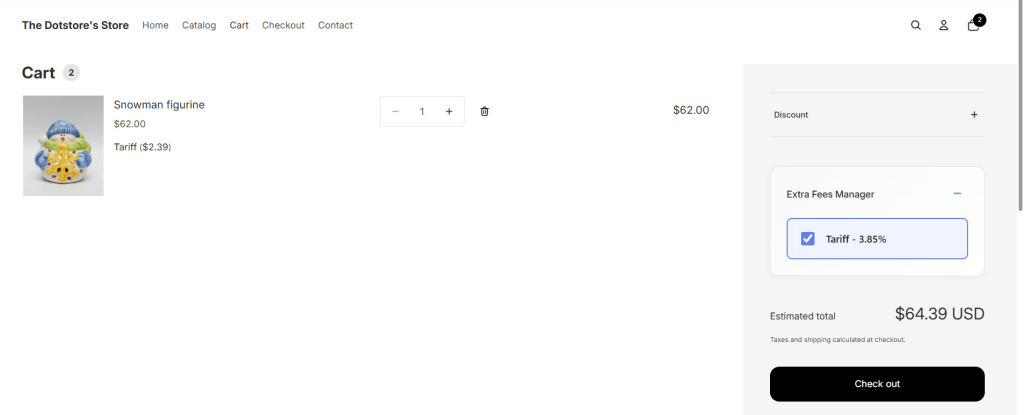
These fees can be structured as a flat fixed amount (e.g., a $3.00 handling fee), a percentage of the order total (e.g., a 2.9% credit card surcharge), or a combination of both. When set up correctly, fees appear as separate, clearly labeled line items on the cart and checkout screens that inform customers exactly what they’re paying for and why.
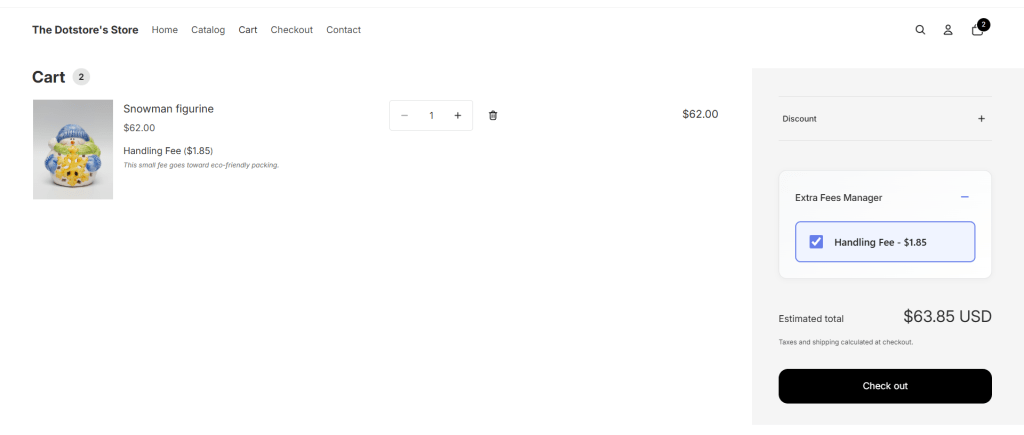
Here’s what that looks like in practice:
Types of fees you can add to a Shopify cart
Shopify merchants across a wide range of niches use extra fees to cover different types of costs. The most common include:
- Payment gateway-based fees. A surcharge applied when a customer pays using a specific payment method. For example, an added fee to the cart for paying with a credit card, cash on delivery (COD), or cryptocurrency payments. This helps offset the processing fees charged by payment providers.
- Small cart or minimum order fees. A flat fee triggered when a customer’s cart falls below a minimum order threshold. This encourages customers to add more items to their shopping carts to avoid the fee, which increases average order value.
- Packaging or handling fees. An extra charge to cover the cost of preparing an order for shipment; particularly useful for fragile items, oversized products, temperature-sensitive goods, or custom-assembled product bundles.
- Shipping location-based surcharges. Fees for shipping to addresses in a region that costs significantly more to deliver to. Think: remote areas or international destinations.
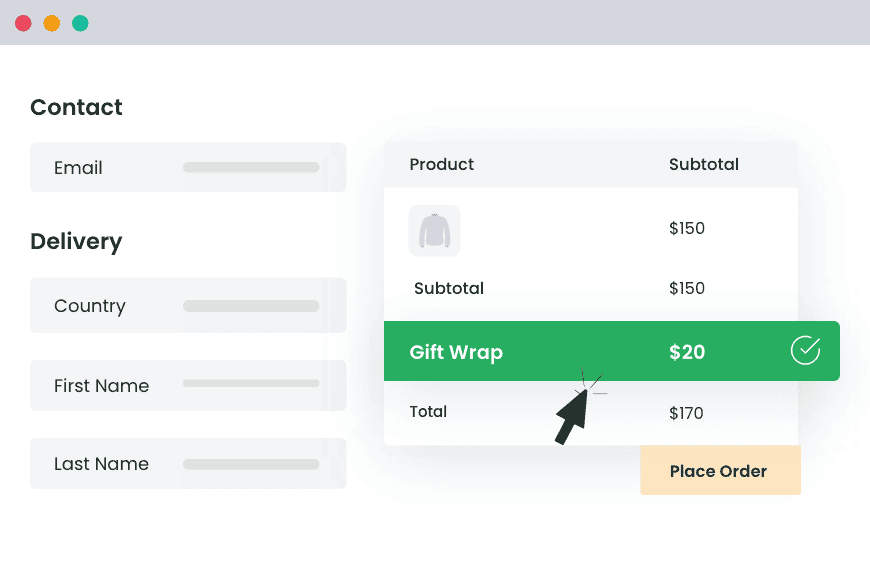
- Optional add-ons. Service-based fees that customers can opt into during the checkout flow. Think: gift wrapping, order personalization, engraving, shipping insurance, etc.
- Rush processing or priority fulfillment fees. A surcharge for customers who prefer their order fulfilled or shipped ahead of your standard order fulfillment timeline.
- Product- or category-specific extra charges. Fees tied to specific SKUs, product types, or collections, for example, a fragile item handling fee that only applies when certain products are in the cart.
Why add extra fees to your Shopify store?
Introducing additional fees to the checkout flow can result in a reduction in your Shopify store’s conversion rate. Here’s why merchants across various niches choose to add them anyway:
- To protect profit margins. Operational overhead (think: packaging materials, payment processing fees, warehouse pick-and-pack charges, labor) can add up very fast. Passing these costs on selectively and transparently, only when they apply, is a far better approach than baking them into every product price or absorbing them outright.
- To keep product prices competitive. If adding every possible cost to your base price would push you above what the market expects to pay, separating those costs out as transparent fees lets you stay price-competitive on the product while still recovering what you need to. Otherwise, your business will seem more expensive than the competition, even if it isn’t.
- To improve the customer experience with value-added services. Optional fees like gift wrapping, product customization, or priority shipping are not just revenue opportunities for your business; they solve real problems for customers. For instance, a customer buying a birthday present who can get it gift-wrapped at checkout will appreciate the convenience, and you get incremental revenue with minimal overhead.
- To adapt your store’s pricing to your business model. For merchants who sell custom-made or made-to-order products, extra fees make it possible for customers to configure and personalize their purchases in a way that reflects your true costs of production. This simplifies your accounting calculations.
Introducing a powerful Shopify app for adding extra fees to the cart

The Dotstore’s Extra Fees Manager is a powerful app that lets you add various types of custom fees, such as handling fees, credit card processing charges, gift wrapping fees, cash on delivery extra charges, and much more.
Once installed, its built-in setup wizard walks you through creating your first fee within a few minutes. You start by creating a fee inside the app dashboard: give it a name, choose whether it’s a fixed amount or a percentage of the order total, decide if it’s taxable, and choose whether it applies at the product level or the cart level.
From there, you can optionally add a description, which is shown to customers in the cart and checkout flow, a fee image, and a scheduled start and end date.
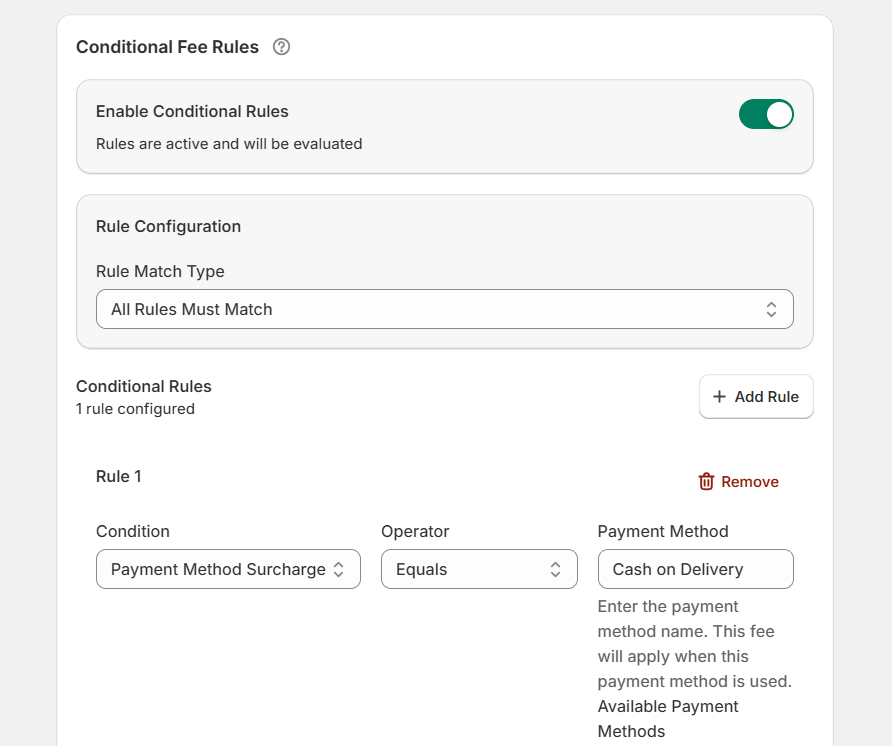
Instead of applying a fee to every single order, Extra Fees Manager’s powerful conditional rules engine lets you define specific conditions that must be met before the fee is triggered: cart total thresholds, specific products or collections, customer location, payment method, customer type, and much more. This makes sure that fees are only applied when required.
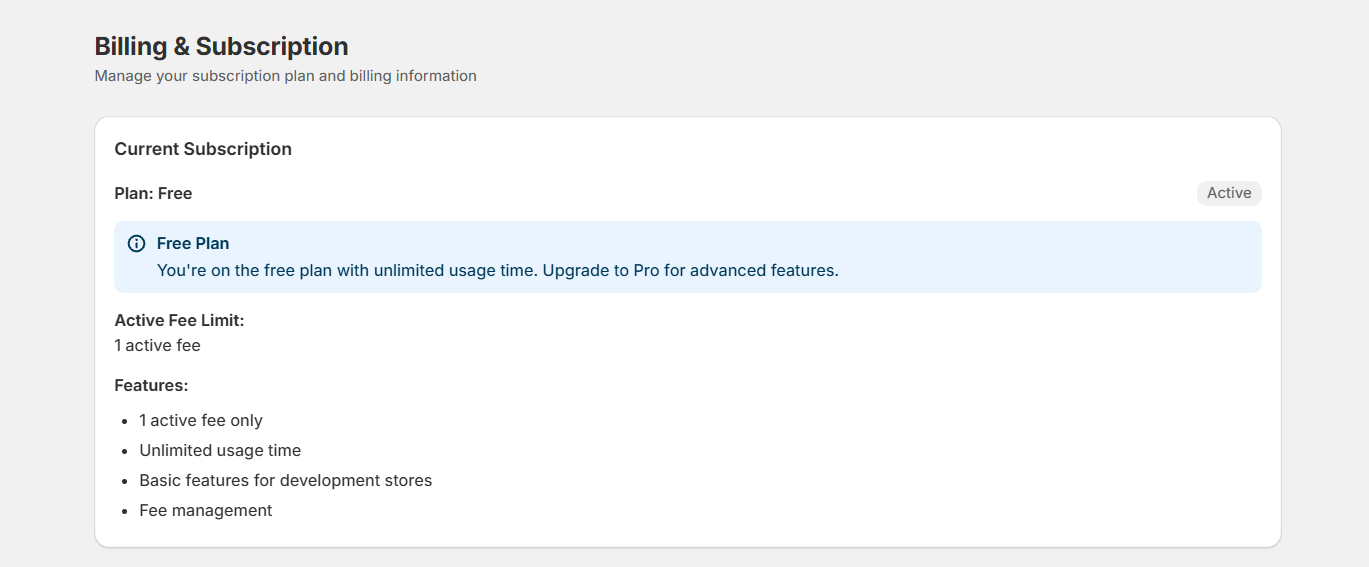
Extra Fees Manager is available in a free version that lets you create one fee with basic features, and a pro version that supports unlimited fees with access to all advanced features. You can install both versions directly from the Shopify App Store.
Key features
- Unlimited custom fees. There’s no restriction on the number of extra fees you can add to your store.
- Fixed and percentage-based extra fees. Want to adapt the charge to your business model? You can choose between a flat rate or a percentage of the order total, as desired.
- Product-level and cart-level targeting. It lets you apply fees only when specific SKUs, product variants, or collections are in a customer’s shopping cart or apply them across the entire order. This empowers you to control which orders incur which charges.
- Advanced conditional rules. You can trigger fees to apply to shopping carts based on a wide range of conditions: cart total, item quantity, number of unique products, specific products or collections, customer tags (e.g., wholesale vs. retail), shipping country or region, payment method, shipping method, and more.
- Standalone fee display. The Extra Fees Manager app displays every custom fee in a separate modal on the cart page and as its own separate, clearly labeled line item on the checkout page. This makes sure that customers know what the extra charge is for.
- Built-in fee scheduling. You can set a start date and end date to automatically activate and deactivate each fee. This is particularly useful for seasonal surcharges, holiday gift wrap offers, or handling fees during peak-periods.
- Multi-currency support. For stores that sell internationally, fee amounts are automatically converted to each customer’s local currency during the checkout process. This keeps the user experience seamless wherever your customers are located.
How to add a fee to a Shopify cart
In this section, I’ll walk you through 3 methods to add a fee to your Shopify cart: using the Dotstore Extra Fees Manager app, native shipping handling settings, and using Shopify POS (Retail).
Method 1: Add a fee to your Shopify cart using an app (Recommended)
- From your Shopify admin panel, navigate to Apps → Shopify App Store.
- Type “Dotstore Extra Fees Manager” into the search bar and install the app on your store.
- After installation, go to Apps → Extra Fees Manager → Billing. You must first choose a free or paid plan to activate the app. Note: This step is mandatory.
- Navigate to Apps → Extra Fees Manager → Fees.
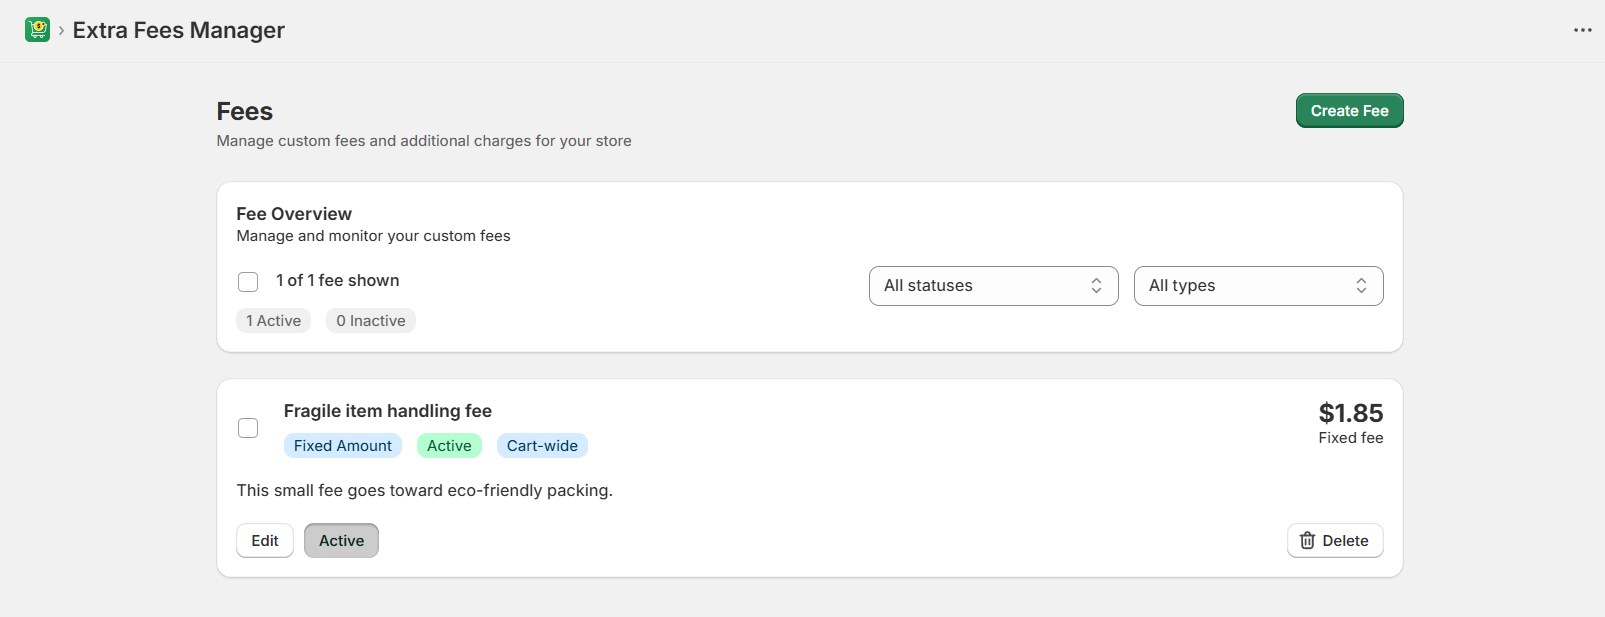
- Press the “Create Fee” button to start configuring a new fee rule. You can also follow the built-in setup wizard, which will walk you through the configuration process from start to finish.
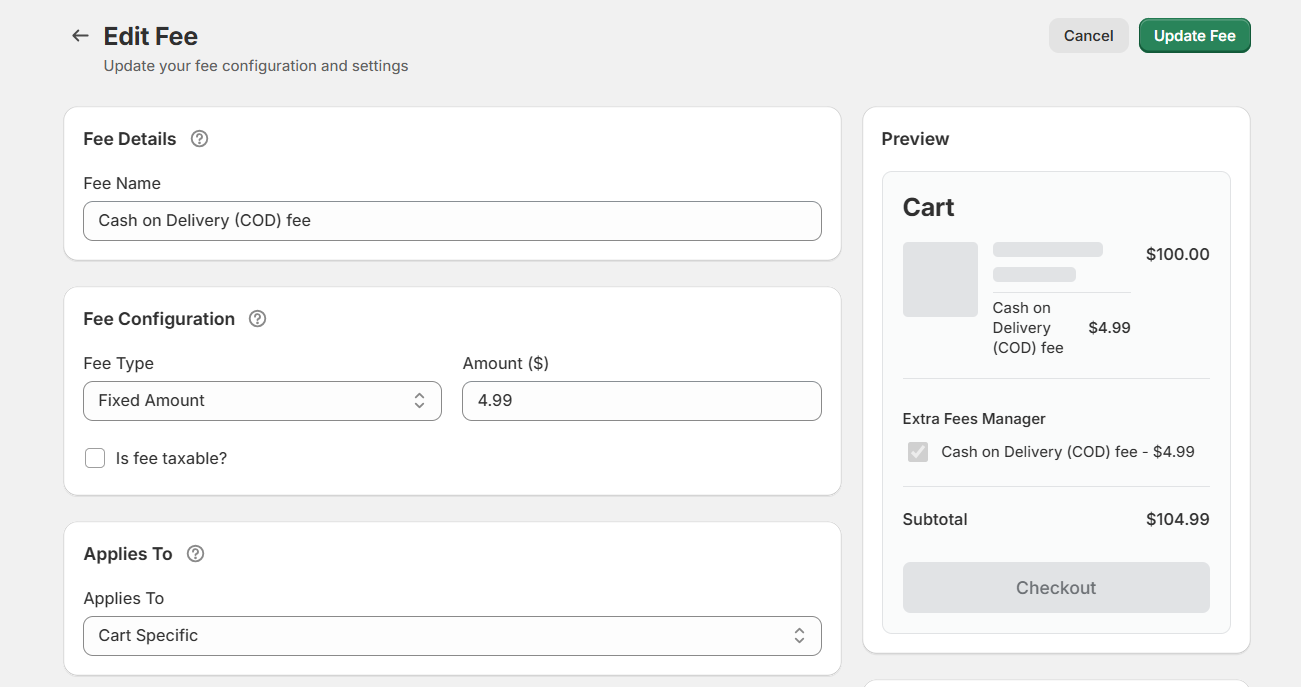
- Give this fee a simple, descriptive name, for example, “Gift Wrapping,” “Priority Processing,” or “Fragile Item Surcharge.” Note that this label will be shown to customers on the cart and checkout screens.
- Decide whether the extra fee should be a fixed amount or a percentage of the order total.
- Add the fee amount in the fee value field.
- Toggle on the tax setting to make this fee subject to tax calculations. Otherwise, leave it off.
- Next, denote whether this fee should be applied to specific products only or to the entire cart.
- Now, add the remaining details that give customers more context on the purpose of the added fee:
- Description — A short explanation of what the fee covers, shown to customers at checkout.
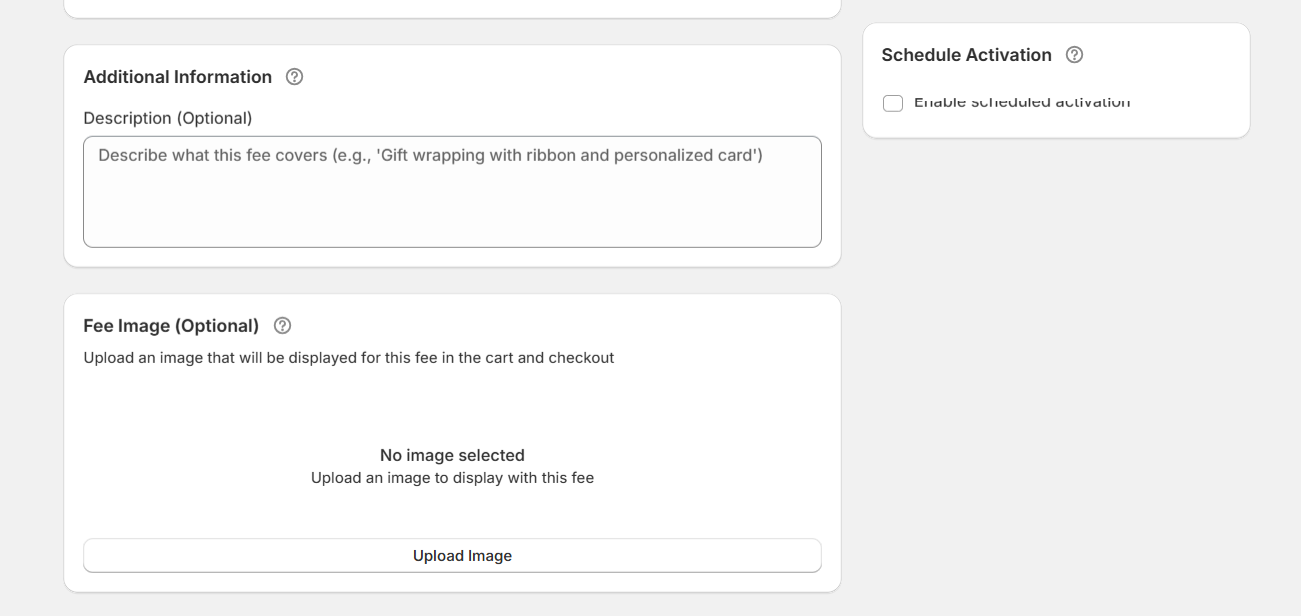
- Image — A small icon or graphic displayed alongside the fee in the cart and checkout.
- Schedule — Start date and end dates to automatically control when the fee is active.
- Description — A short explanation of what the fee covers, shown to customers at checkout.
- To specify conditions that control when and how the extra charge is applied, toggle on the “Enable Conditional Rules” button. From here, you can add rules and conditions that trigger the fee based on cart total, total item quantity, specific products or collections in the cart, customer location, customer type, tags, and more.
- Press the “Create Fee” button to save your settings.
Important: Embed the fee calculator on your Shopify cart page
This setting adds a modal that shows the extra fee to your store’s cart page. Enabling it makes the fee visible on your store’s cart page before checkout.
- From your Shopify admin panel, access Apps → Extra Fees Manager.
- Go to the “Enable App Embed” section and press the “Enable App Embed” button to open your theme editor in a new tab.
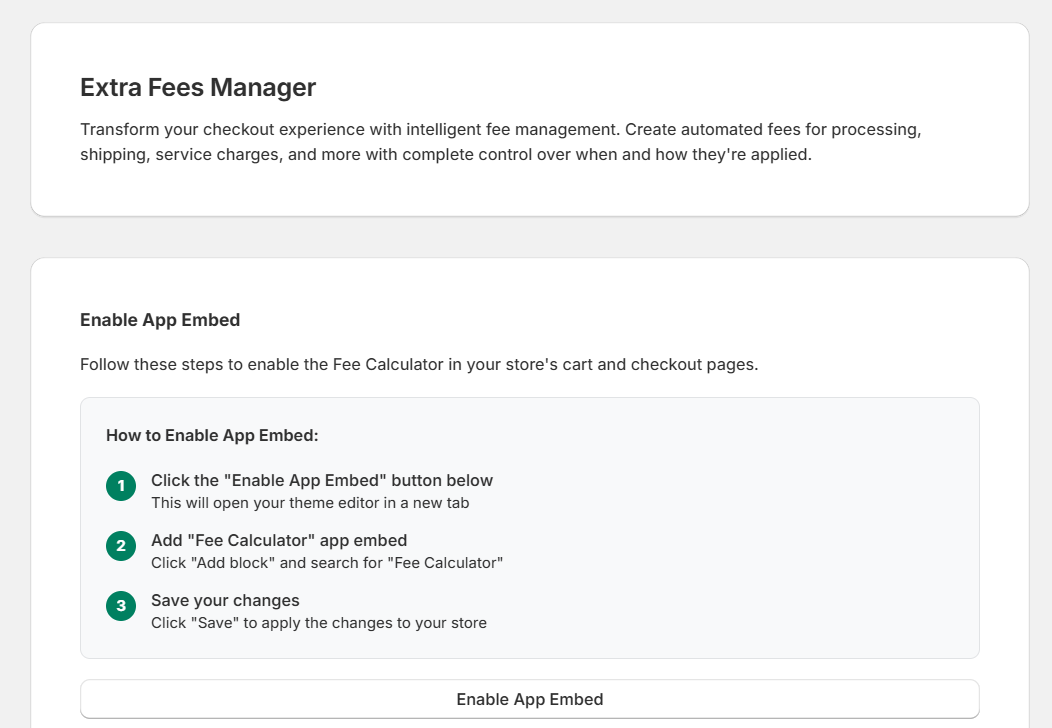
- From the theme editor, go to the “Apps” tab.
- Switch on the Dotstore Extra Fees Manager button.
- Save your settings.
That’s it. To confirm the additional fee configuration, add a qualifying product to the shopping cart and proceed through the checkout flow to confirm that the fee appears as a standalone line item.
Method 2: Add a fee using Shopify’s native shipping handling settings
There is no direct feature to add an extra charge to online carts in Shopify, with one exception: adding handling charges to third-party carrier-calculated shipping rates. As you can imagine, this can be restricting.
Here are the limitations to using Shopify’s default shipping handling settings:
- ❌ Shopify combines the handling fee with the shipping fee on the cart and checkout pages, rather than showing it to customers as a standalone charge in a separate line item.
- ❌ It can only be applied to 3rd-party carrier-calculated rates (e.g., Printful, ShipStation), and not default shipping methods like flat-rate or free shipping.
- ❌ You cannot apply it to shopping carts based on specific products, customer location, cart value, payment method, or any other condition.
- ❌ There’s no option to schedule the extra fee or show a description alongside it.
How to add a fee using Shopify’s default shipping handling settings
- In your Shopify admin, go to Settings → Shipping and delivery.
- Under “Shipping profiles”, locate the profile you want to update.
- Press the “Manage rates” button.
- Scroll to the Shipping zones section and find the carrier-calculated rate to which you want to apply the fee.
- Press the ⋯ (three-dot menu) on its right and select “Edit rate”.
- Locate the “Handling fee” section in the rate editor and add the fee either as a percentage, a flat amount, or both.
- Press “Done”, then save the shipping profile to add the extra fee.
The fee will now be added to the carrier rate as a handling charge and displayed as part of the total shipping cost during the checkout flow.
Method 3: Add a custom fee using Shopify POS (Retail)
Shopify POS has a built-in custom fee option for physical retail locations and pop-up shops that want to add extra charges to in-person orders. This is handy for adding extra charges for personalization, gift wrapping, rush service, special packaging, etc.
Keep the following limitations in mind:
- ❌ This method only works on in-person orders made at the point of sale (POS). It does not apply to orders placed from your store’s online checkout.
- ❌ You can only apply one custom fee per order.
- ❌ Fees can only be added to carts manually by the sales rep. You cannot define conditional logic rules that automatically add fees to carts once they meet certain conditions.
Method A: Add a custom fee tile to your smart grid
Follow these instructions to set up a “reusable” fee that can then be applied to multiple carts.
- Access the Shopify POS app on your device.
- In the smart grid, press “Add tile”, then select “Fee” to create a new fee tile.
- Add a name and fee amount, then press “Save”.
The fee tile will now appear in your POS smart grid. Your sales reps can apply it to any in-person order with a single tap.
Method B: Add a custom fee directly to a customer’s cart
Follow these instructions to set up a one-time fee to be added to one specific cart.
- Access the Shopify POS app on your device.
- In the smart grid, press the “Custom fee” tile.
- Add the fee amount and press “Save”.
Ready to add a fee to the cart in your Shopify store?
Adding extra fees to the cart in Shopify is probably the most practical way to protect your profit margins without raising base product prices across the board. Whether you need to recover packaging costs, pass on payment processing fees, charge for optional services, apply location-specific surcharges, or add a fee to checkout when a specific product is in the cart, the right method depends on how and where you need the fee to appear.
Here’s a quick recap of the 3 methods we covered in this tutorial:
- The Dotstore’s Extra Fees Manager is the most powerful and flexible option. It displays fees as transparent, standalone charges in the cart and checkout, supports advanced conditional rules, and works for virtually any type of extra fee you want to create.
- Shopify’s native shipping handling fee is a simple built-in option, but it only works with third-party carrier rates and bundles the fee into the shipping total. This means that customers don’t see it as a separate charge.
- Shopify POS custom fee tiles are great for adding one-off charges to in-person retail orders. However, you can’t add them to your online store’s checkout flow.
For most Shopify merchants, The Dotstore’s Extra Fees Manager is the best all-around solution. It’s quick to set up, easy to use, and handles everything from simple flat-rate handling fees to complex conditional surcharges, without you needing to write a single line of code.
Ready to start adding fees to the cart in your Shopify store? Get the free or pro version of The Dotstore Extra Fees Manager app today!
Shopify Extra Fees Manager
Add dynamic checkout fees for add-ons, upcharges, surcharges, etc., to your Shopify store — the easy way!
14-day, no-questions-asked money-back guarantee.

🌟 Supercharge Your Shopify Revenue with the Extra Fees!
Try the plugin 100% risk free!