Table of Contents
Preparing your e-commerce store for upcoming sales and not able to implement a storewide discount in your online store?
Well, it could be a tough task to accomplish if you are not into development and cannot write code for custom plugins. You might need an e-commerce developer, a lot of time and money to get it done in such a scenario. However, if using WooCommerce, it is doable by eCommerce owners in no time, even if you are not equipped with technical and programming knowledge.
In this post, we will tell you about how to apply storewide discounts in your WooCommerce store using a simple-to-use and comprehensive plugin. Let’s first talk about the importance of having the ability to apply store-wide discounts so that you could make up your mind to get started towards it if not done yet.
Why and When to Apply Storewide Discounts in WooCommerce?
Christmas, Black Friday, Independence Day, Special Festivals, Business Anniversaries – there are so many occasions when you might want to run sales. These are the times when customers seek special treatment from the sellers and most of the online stores do give significant discounts. If an online store skips doing so, your sales will definitely go down, as other rivals are offering impressive discounts.

Similarly, online businesses find it hard to sell, when there is a lot of competition in their domain. So, discounts work as an effective and cheap method of marketing. Giving discounts to your buyers keep them coming back to your e-commerce store to check interesting offers, increasing your sales.
So, in all the ways, having a method to enable storewide discount is a beneficial deal for online stores.
How to Add a Storewide Discount in WooCommerce?
As we have told at the beginning of this post, we are going to use WooCommerce Conditional Discount Rules for Checkout Pro Plugin for explaining the process of applying storewide discounts. Hence, we are assuming that you must have downloaded and installed this plugin with your online store by now. If not, please use the above link so that you could follow the steps with us. Or, you can go this demo link, click on ‘View Admin’ and check how this plugin works.
WooCommerce Dynamic Pricing and Discount
Apply advanced discount conditions to drive more revenue with our intuitive and easy-to-use plugin.
14-day, no-questions-asked money-back guarantee.

Step – 1
Click on the ‘Add Discount Rules for Checkout’ link, present in the top row of the plugin dashboard. This dashboard is enclosed with your WordPress dashboard itself and can be found by clicking on the name of a plugin from the left-side menu bar.
Step – 2
After clicking on the ‘Add Discount Rules for Checkout’ button, you must have reached the web page meant for the creation of a discount rule.
On this page, you have got to fill 2 forms. One is Fee Configuration form and another is the Dynamic Discount Rule form.
Now, the latter form is for applying different conditions on your overall rule. Through this, you can narrow the scope of your rule and specify when or when not your discount rule should work. As you do not want to apply any extra condition and deploy a storewide discount in the current scenario, this section (Dynamic Discount Rule) will be left completely blank for now. However, it is of utter use when it comes to specialized conditions.
Let’s fill the Fee Configuration form now. It looks like –
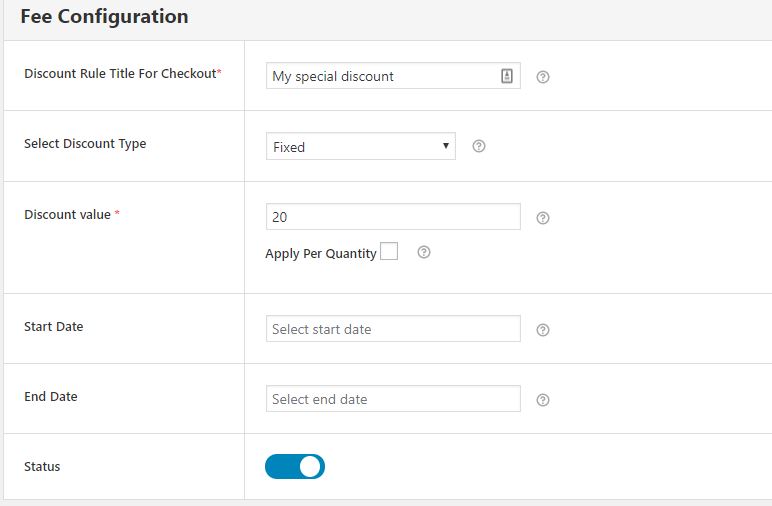
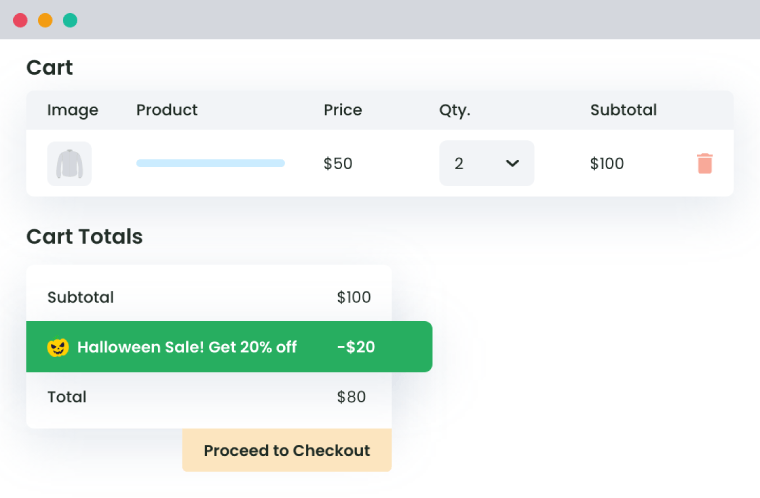
In this section, The ‘Discount Rule Title for Checkout’ field is for adding a name to your discount rule. It will be displayed in the cart during checkout, so choose the name carefully. This name will help your customers understand the purpose or properties of your discount.
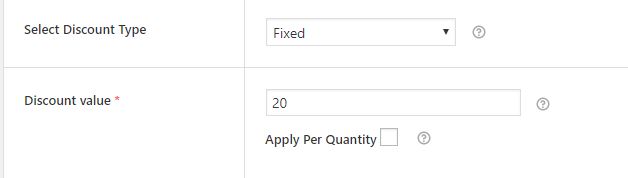
Through this plugin, two types of discounts can be given to the customers – Fixed and Variable.
Fixed discounts can be given when you want your buyers to avail fixed value amounts, such as $4, $52, $12, $15, etc.
Variable discounts can be selected when you’ve to apply percentile-based discounts on the shop, such as, 5%, 30%, and so on.
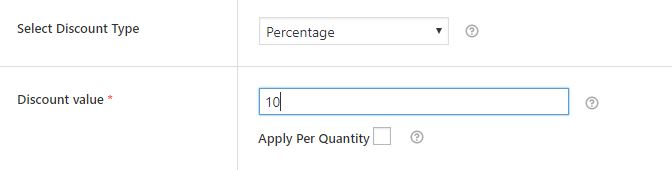
After choosing the discount type, you will have to add a number in the Discount Value field. Note that if you have selected a fixed value amount for the discount, your filled value will be considered as a currency value, while in the case of variable discounts, it will be considered as a percentage value.
At this point, you must be seeing a checkout named as ‘Apply per Quantity’.
It’s for those times when you want to give different discounts for a single product and multiple products. For example, if you want to give a 30% discount on a t-shirt if a buyer purchases 1 item. On the other hand, if it is a bulk purchase, you want to give a 5% discount on each next product. So, there will be a base discount and incremental discount. This condition can be easily deployed with your cart through this plugin. Here’s how –

Now, you may set a start and end date for your discount campaigns too. Such settings can save you from last-minute hassles of enabling and disabling discounts for a limited-time sale. So, just add the dates in these fields and schedule your sales as you want.
In the end, you want do not want to immediately enable a method, or do not want to continue applying a particular discount rule with your WooCommerce Shop, you can change the status of your discount rule, setting it to ON or OFF. It will work as per your selection, henceforth.
As told already, applying a discount rule to your whole shop requires you to refrain from adding any condition in the Dynamic Discount Rule section. So, leave it blank. However, if you want to apply your discount rules to a narrowed list of buyers, add dynamic rules to this section.
Finding it difficult to use WooCommerce Conditional Discount Rules for Checkout Pro plugin with your WooCommerce online shop? Drop our experts a query and we’ll reach out to you. Our flawless support makes this comprehensive discount solution even smooth & powerful for the e-commerce store owners.
WooCommerce Dynamic Pricing and Discount
Apply advanced discount conditions to drive more revenue with our intuitive and easy-to-use plugin.
14-day, no-questions-asked money-back guarantee.