Table of Contents
Banner management in WooCommerce is one topic that has garnered huge attention. In simple terms, banner management is the act of introducing ads in your WooCommerce store. Whether you wish to have one or more, on your shop page or the cart page, you can do all.
But don’t you think it would be a mess to create applications for each of these. Figuratively yes. And so we bring in the idea of using a custom-designed plugin for the same. The WooCommerce Category Banner Management is one that gives you the flexibility to set specific banners on your WooCommerce page.
Wondering how to use the plugin?
This article will guide you through the steps along with different ways to add an image banner in your WooCommerce store. Additionally, you may further add a few more marketing plugins to your store too. Without further ado, let’s get started.
Prerequisites: Integrate the plugin
- The first thing to do is to download the plugin. Depending upon whether you wish to opt for the free version or the paid version, head towards the official site and download the plugin.
- After you have downloaded the plugin, the next thing to do is upload the same on the WooCommerce store. To do so, open your WooCommerce site and enter the credentials to authenticate your identity.
- Now hover around the dashboard and scroll down to the plugin section.
- Click on add new. In the upper right corner, you will find an upload button.
- Click on it. Now insert the downloaded file and click on upload.
- You will now see the plugin in your plugin list. Click on install plugin.
- It might take a couple of seconds. Once done, activate the plugin.
Once you have the plugin installed, you can now configure the same to add banner images as and where you like. The plugin must now appear in the dashboard’s menu of your WooCommerce admin side.
WooCommerce Banner Management Plugin
Gain full control over banner displays across your store. Boost conversions and sales today!
14-day, no-questions-asked money-back guarantee.
How to add an image banner to the top of the WooCommerce shop base page?
Adding banner images using the WooCommerce Category Banner Management plugin is pretty easy. Follow the steps given below to do the same:
- Log in to the WooCommerce dashboard.
- Click on the plugin and then select the WooCommerce Category Banner Management plugin.
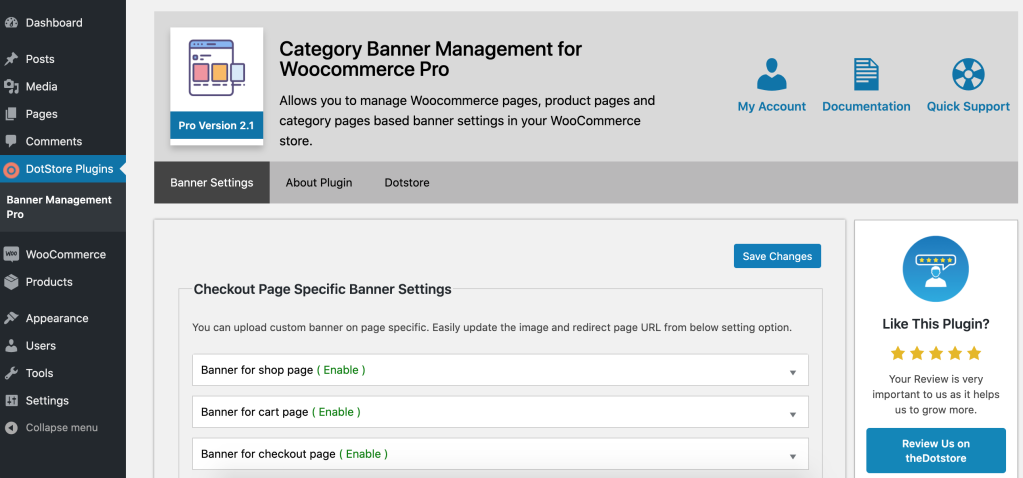
- As the page opens up, you will find Banner settings as the first tab.
- There are different ways to add a banner image to the WooCommerce store. As evident, the plug-in allows you to add checkout specific images, product-specific, and category-specific.
- Since we need to add banner images at the top of the shop base of the WooCommerce site, we will click on Checkout page-specific banner images.
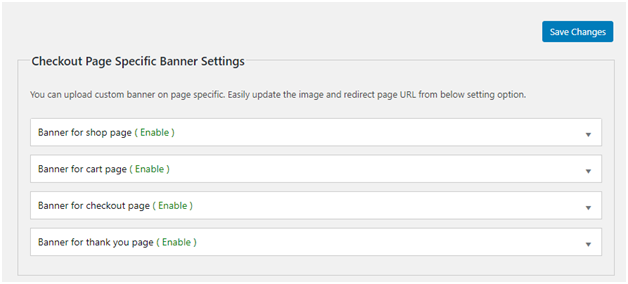
- Here we have four different drop-down with options as a banner for:
- Shop page.
- Cart page.
- Checkout page.
- Thank you page.
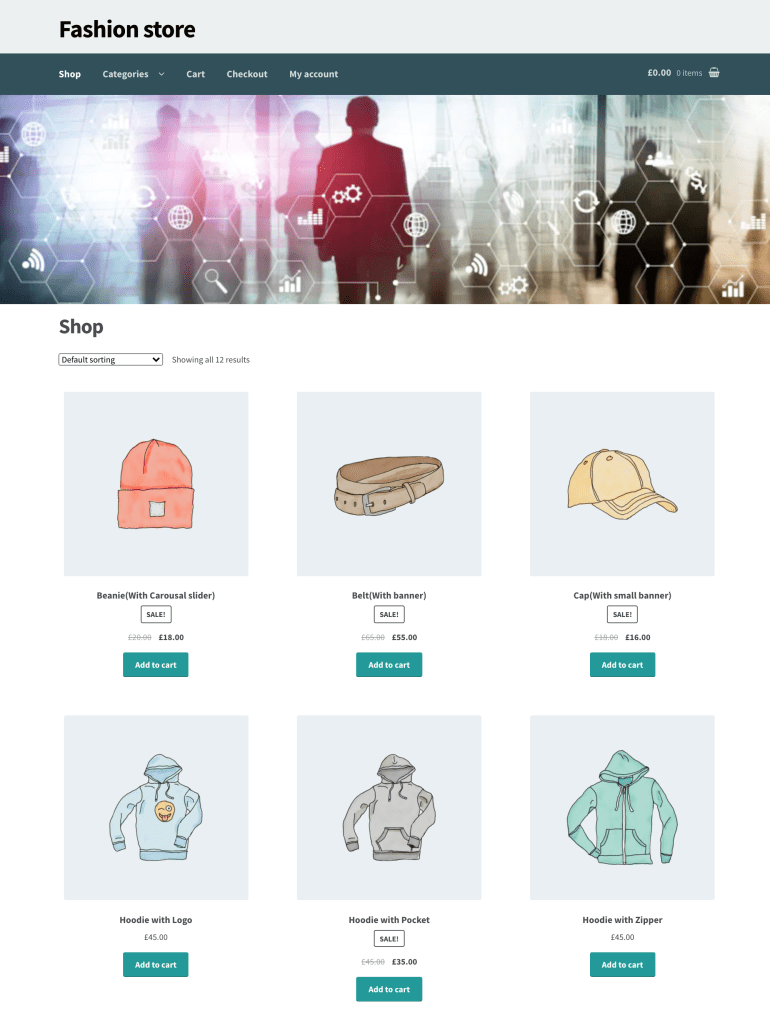
7. Click on the banner for the shop page and you will see the following options:
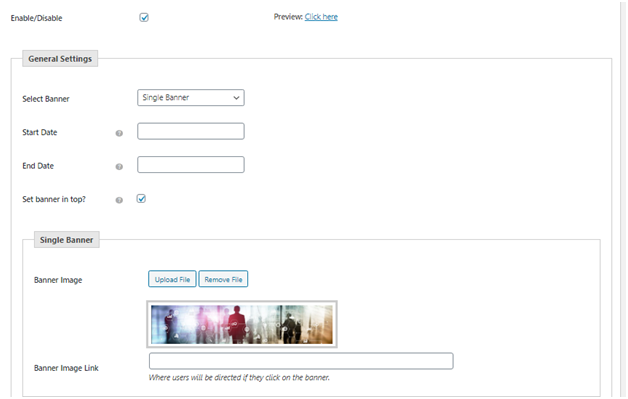
8. Enable/Disable: Selecting the checkbox would enable the banner image. And unchecking would disable the same.
- Select Banner: Whether you want to add a single image or one or more images in the banner, select it from here.
- Start Date: To run the banner for a particular period, enter the date from when you wish to start the display.
- End Date: Like the start date, enter the end date for the banner. For example, if you are displaying a sales banner, it is expected that the sale would last for a few days. The end would specify when the sale ends.
- Set banner in the top: Select the checkbox to add the image banner at the top of the shop page.
- Single/Multiple Banner:
- Banner image: Upload the images that will be displayed as the banner. Click on the Upload file and import the selective images.
- Banner image link: Enter the link of the banner image.
- Banner type: With respect to multiple banners, specify whether you want the images to be in a slider format or a random one.
- On the top right corner, click on save changes.
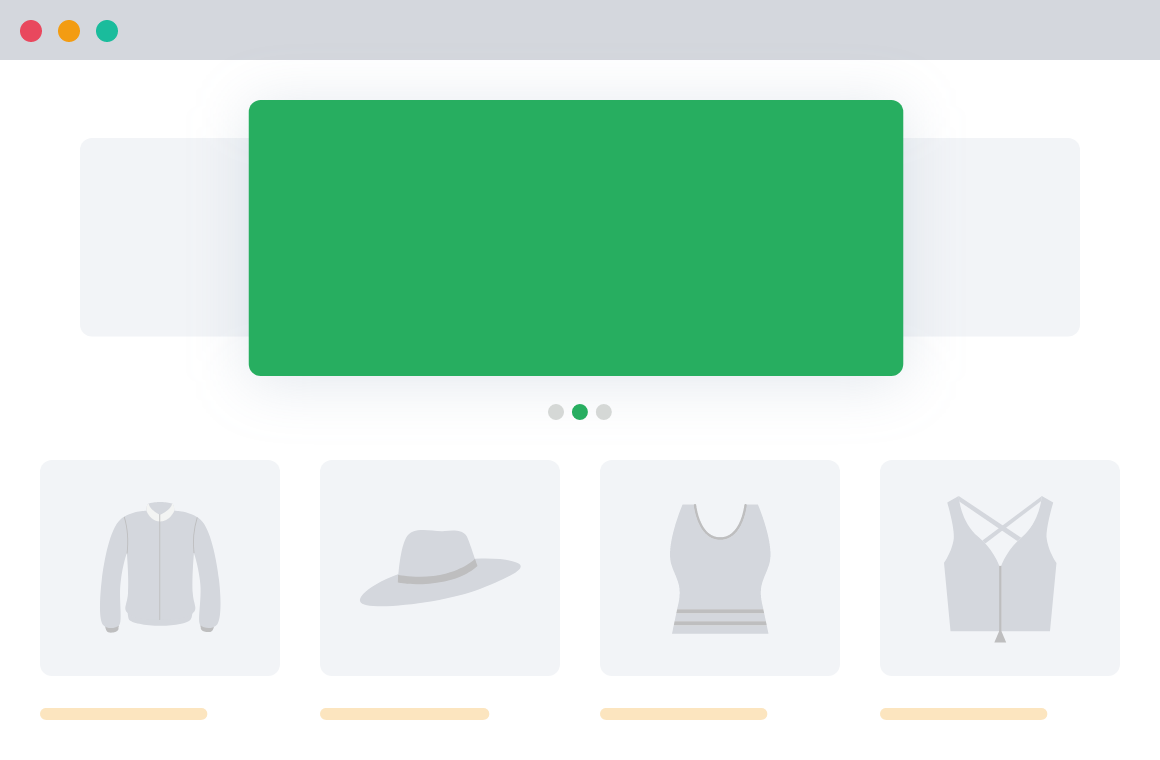
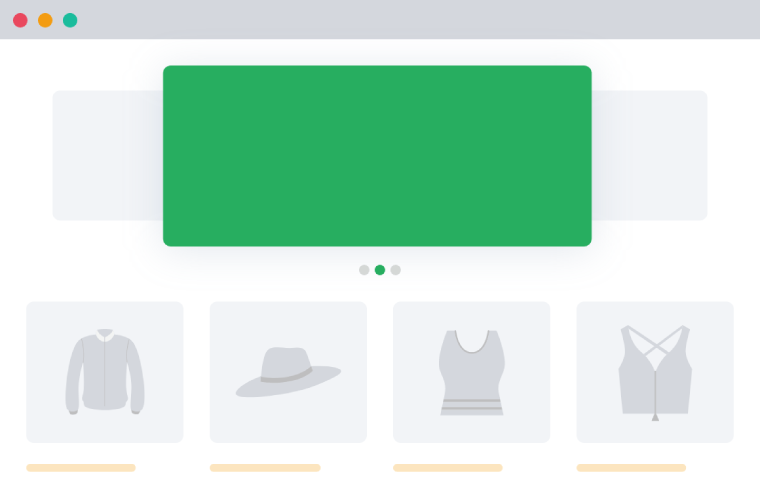
This is how it will appear on the main shop page:
How to set an image banner on the WooCommerce shop page?
To set an image banner on the WooCommerce shop page, follow the steps given above. The only difference between the two is that this doesn’t specify if the image must be at the top of the page.
While configuring the plugin, enter the details except the one in the Set banner at the top. Deselect the checkbox and move ahead with the configuration process. Do not forget to save changes before heading out of the plugin page.
How to set a full-width banner on the WooCommerce shop page?
To set the full-width banner on the WooCommerce shop page, follow the steps given in the first part: How to add an image banner to the top of the WooCommerce shop base page?
You can modify the settings depending on whether you want a single image banner or a multiple image banner. In addition to this, if you want to set a full-width banner on the WooCommerce page, do the following:
- Scroll down to the global settings. Here we have two different options:
- Default WooCommerce page banner settings.
- Product page banner settings
- Move to the default WooCommerce page banner settings.
- Here you will find the option of Select Banner Size.
- From the drop-down select 100% for full-width banner size.
Click on save changes to implement the selected option.
How to set a site-wide banner on the WooCommerce shop page?
To set the site-wide banner on the WooCommerce shop page, follow the steps given in the first part: How to add an image banner to the top of the WooCommerce shop base page?
Modify the settings based on whether you want a single image banner or a multiple image banner. In addition to this, if you want to set a site-wide banner on the WooCommerce page, do the following:
- Scroll down to the global settings. Here we have two different options:
- Default WooCommerce page banner settings.
- Product page banner settings
- Move to the default WooCommerce page banner settings.
- Here you will find the option of Select Banner Size.
- From the drop-down select fit to the container for full-width banner size.
Click on save changes to implement the selected option.
The Final Word: How do I add a banner to my store?
Adding banner to your WooCommerce store is both simple and easy. Thanks to the exhaustive list of features offered by The WooCommerce Category Banner Management. Besides adding image banners on the shop page, the plugin allows you to add them to the cart page, the Checkout page, and also the thank you page.
Settings for each of these are the same as How to add an image banner to the top of the WooCommerce shop base page? In addition to this, you can also set banners relative to a particular product or a category of the product.
The banner would be displayed on all pages of the product/category for which the banner has been added. For product page banners, you have additional fields such as change text color or background color. Select them as and when needed. You can test and try different things to have the best kind added to your store.
WooCommerce Banner Management Plugin
Gain full control over banner displays across your store. Boost conversions and sales today!
14-day, no-questions-asked money-back guarantee.

🖼️ Create Stunning Banners for Products and Categories
Try the plugin 100% risk free!