Table of Contents
Quick answer: WooCommerce has a built-in tax system that handles GST. Go to WooCommerce > Settings > General and tick “Enable taxes.” Then open the Tax tab, create tax classes for your GST slabs (5%, 12%, 18%, 28%), add rate rows for your country and states, and assign each product to the correct class. No GST-specific plugin is required.
Key Takeaways
- WooCommerce handles GST natively: enable taxes, set your rates and tax classes, and choose how tax is calculated by location.
- You can import rates by CSV to set up multiple regions quickly instead of adding each one by hand.
- For complex cases like location, category, order value, or user-role rules, the Extra Fees plugin applies GST conditionally with no coding.
- Setting up GST on custom fees takes one step: enable “Is Amount Taxable” and pick the right tax class.
- WooCommerce reports, CSV export, and accounting integrations (Tally, QuickBooks, Xero) make GST reporting and filing easier.
- GST rules vary by country, so treat India’s slab examples as one case and confirm your setup with a tax professional.
If you sell in India, GST (Goods and Services Tax) is mandatory on most products and services. The good news is that you do not need a separate plugin to charge it.
WooCommerce ships with a complete tax engine that supports multiple rates, tax classes, state-level rates, and inclusive or exclusive pricing. This post walks through the full setup, from switching taxes on to showing GST correctly on the cart, checkout, and invoices.
GST in India is a multi-rate tax. Most goods fall into one of four slabs: 5%, 12%, 18%, and 28%. WooCommerce models each slab as a tax class, so you create one class per slab and assign products accordingly. That is the core of the whole job.
What GST means inside WooCommerce
WooCommerce does not have a field literally labelled “GST.” Instead, it has a generic tax system that you configure to behave like GST. The pieces you work with are:
- Tax classes: named buckets that group products taxed at the same rate. You will create one per GST slab.
- Tax rates: the actual percentages, defined per country and optionally per state, inside each class.
- Standard rate: the default class every product uses unless you assign it to another.
- Display settings: how the tax shows on product pages, the cart, and checkout.
Once these are set, WooCommerce calculates GST automatically on every order based on the customer’s address and the product’s tax class.
Step 1: Enable taxes
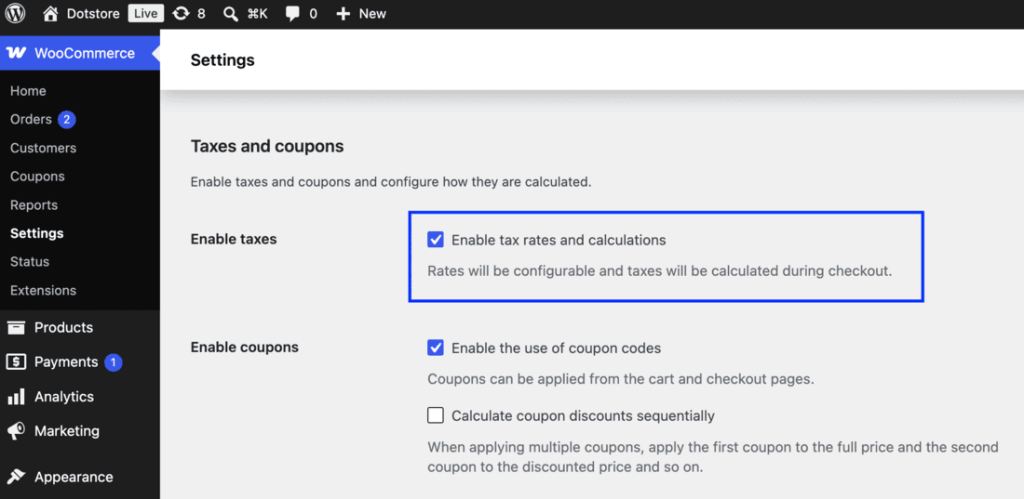
- Go to WooCommerce > Settings > General.
- Scroll to Enable taxes and tick Enable tax rates and calculations.
- Click Save changes.
A new Tax tab appears in the settings bar next to General, Products, and Shipping. All GST configuration happens there.
Step 2: Configure tax options
Open WooCommerce > Settings > Tax. The first screen sets global rules that apply to every rate.
- Prices entered with tax: choose whether the prices you type on product pages already include GST or not. “Yes, I will enter prices inclusive of tax” is common for B2C stores that advertise the final price. “No, I will enter prices exclusive of tax” suits B2B stores that add GST on top. Pick one and stay consistent, because changing it later reinterprets every price you have entered. If your store also adds payment surcharges, plan those alongside tax so they do not clash; see payment gateway based fees for how those are handled separately.
- Calculate tax based on: for GST, set this to Customer shipping address (or billing address if you prefer). This drives whether intra-state or inter-state rates apply.
- Shipping tax class: leave on Shipping tax class based on cart items so shipping is taxed at the same slab as the goods being shipped. More on shipping below.
- Rounding: enable rounding at subtotal level if you want cleaner totals.
- Additional tax classes: this box is where you name your GST slabs. Add the classes you need, one per line.

Step 3: Create tax classes for GST slabs
In the Additional tax classes box, enter your slabs, for example:
GST 5%
GST 12%
GST 18%
GST 28%
Save. Each name becomes a clickable sub-tab at the top of the Tax settings page, alongside Standard rates. You will define the actual percentages inside each one in the next step. Keep the Standard class too; you can use it for your most common slab (often 18%) so most products need no manual assignment.
Step 4: Add tax rates by country and state
GST has two scenarios. For a sale within the same state, GST splits into CGST and SGST (each half the slab). For a sale across states, the full rate applies as IGST. WooCommerce lets you model this with separate rows per state.
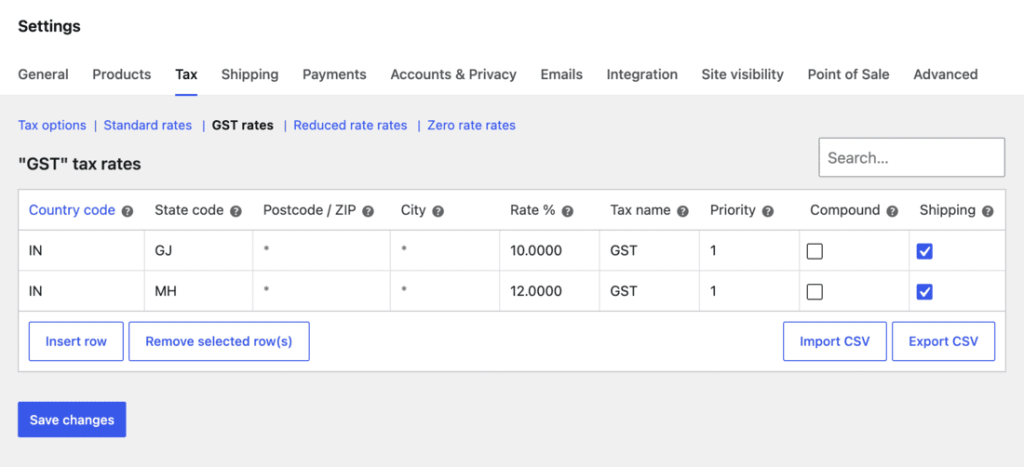
Click a slab sub-tab (for example GST 18%), then Insert row, and fill in:
| Column | What to enter |
| Country code | IN |
| State code | Leave blank for all states, or enter a state code like GJ, MH, DL for a specific one |
| Postcode / ZIP | Usually blank |
| City | Usually blank |
| Rate % | The slab, e.g. 18.0000 |
| Tax name | Label shown to customers, e.g. GST or IGST |
| Priority | 1 |
| Compound | Leave unticked for standard GST |
| Shipping | Tick if GST should also apply to shipping for this rate |
For a simple setup, one row per slab with the state code blank and the full rate (for example 18%) covers every customer in India.
If you need to show CGST and SGST as two separate line items, add two rows in the same class for the same location at half the rate each (9% and 9%), give them priority 1 and 2, and name them CGST and SGST. WooCommerce stacks rates that share a location so both appear on the invoice.
Repeat for each slab. If you sell across many states with different CGST/SGST splits, use Import CSV at the bottom of the rate table to bulk-load rows instead of typing each one.
Step 5: Assign tax classes to products
A rate does nothing until a product points at its class.
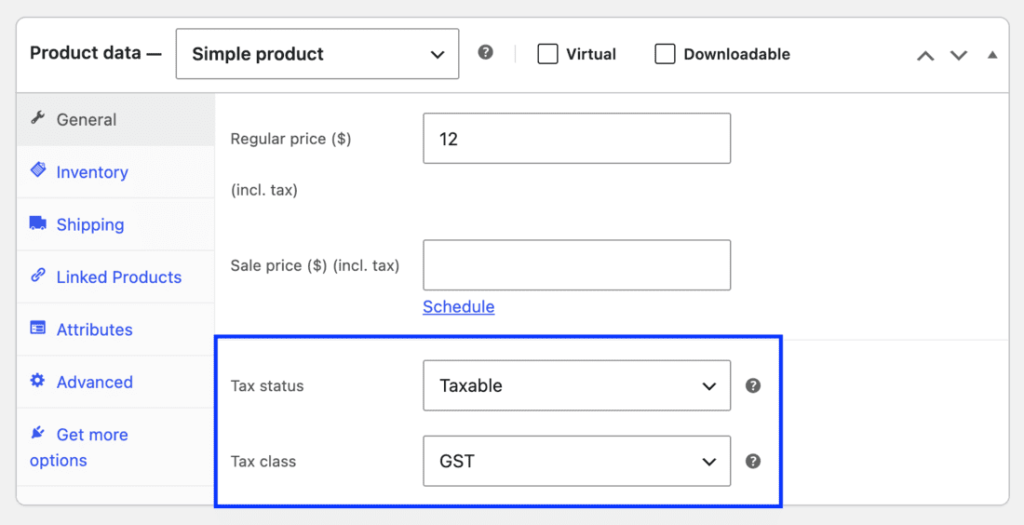
- Edit a product and open the Product data panel.
- On the General tab, set Tax status to Taxable.
- Set Tax class to the matching slab, for example GST 12%.
- Update the product.
For variable products, you can set the tax class per variation. To update many products at once, use Products > All Products, tick the products, choose Edit from Bulk actions, and set the tax class for the whole batch.
Step 6: Choose how GST displays
Back in WooCommerce > Settings > Tax, scroll to the display options:
- Display prices in the shop: show product prices Including tax or Excluding tax on listings and product pages.
- Display prices during cart and checkout: same choice for the cart and checkout totals.
- Price display suffix: add text after the price, such as (incl. GST), using placeholders like {price_including_tax}.
- Display tax totals: choose As a single total or Itemized to list each rate (useful when you split CGST and SGST).
Inclusive display shows one final figure, which most Indian B2C stores prefer. Exclusive display shows the base price and adds GST as a separate line, which B2B buyers usually expect.
Whichever you choose here must match the Prices entered with tax setting from Step 2, or your displayed totals will not line up.
GST on shipping
Shipping is taxable under GST at the same rate as the goods being shipped. WooCommerce handles this when you:
- Set Shipping tax class to Shipping tax class based on cart items in Step 2, and
- Tick the Shipping checkbox on each tax rate row that should apply to shipping.
With both in place, a cart of 18% goods charges 18% on the shipping fee, and a mixed cart applies the appropriate rate automatically.
Compound and multiple taxes
The Compound checkbox on a rate row tells WooCommerce to calculate that tax on top of the running total, including taxes already applied, rather than on the base price alone. Standard GST is not compound, so leave it unticked.
You only need compound rates in the rare case where one tax must be levied on a subtotal that already includes another. For ordinary CGST plus SGST, both are calculated on the same base, so two normal (non-compound) rows are correct.
Showing GST on invoices and reports
WooCommerce records tax per order. To see what you have collected, go to WooCommerce > Reports > Taxes, which breaks down GST by rate and by period and exports to CSV for your accountant or filing.
Order-level tax appears on each order’s detail page and on the customer invoice, itemized if you set display totals to itemized. For formatted PDF tax invoices with GSTIN fields, an invoicing plugin adds those layouts, while the GST calculation itself is already done by core.
GST slab reference
This table maps common product types to the GST slab and tax class you create for them.
| GST slab | Example product type | Tax class to create |
| 5% | Packaged food, footwear under threshold, basic apparel | GST 5% |
| 12% | Processed food, stationery, some electronics accessories | GST 12% |
| 18% | Most electronics, software, services, mid-range goods | GST 18% (or Standard) |
| 28% | Luxury items, large appliances, automobiles | GST 28% |
Use this as a starting map. Confirm the correct slab for each product against current GST notifications, since classifications change.
When you need conditional fees
Standard GST does not need any add-on. The native rate table covers slabs, states, inclusive and exclusive pricing, and shipping tax.
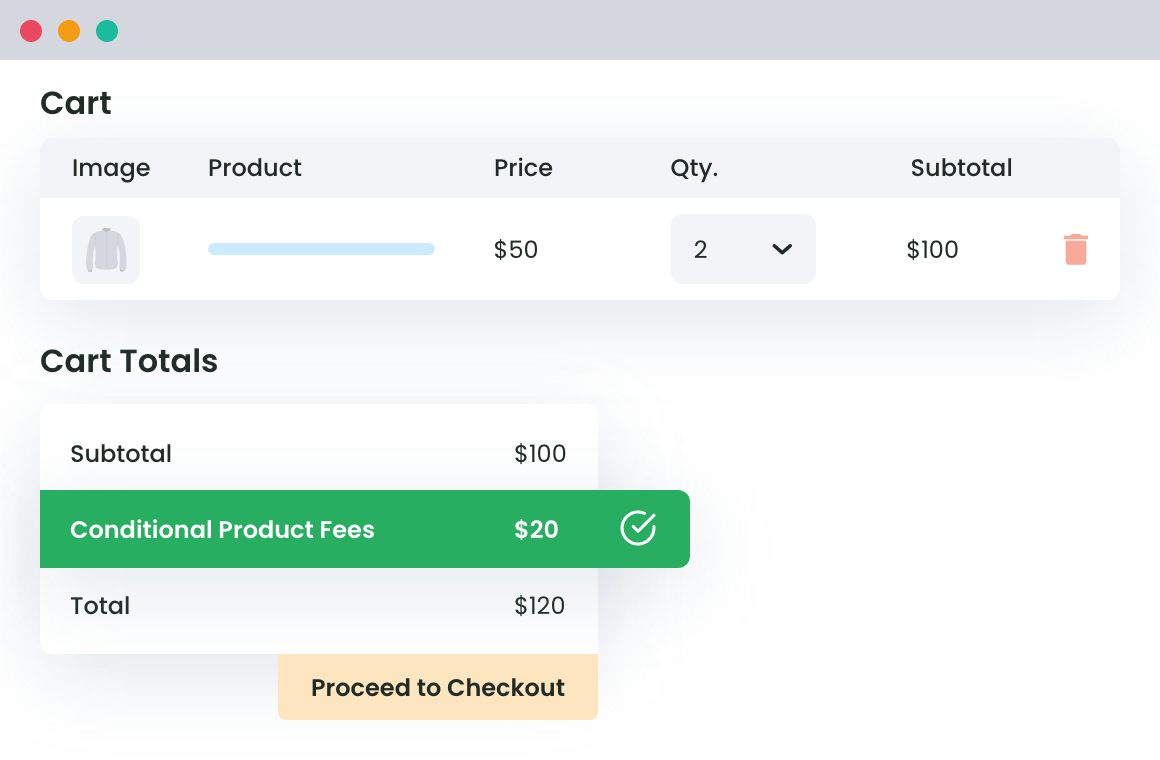
The only time you might reach for an extra tool is a genuinely conditional fee that is not a tax rate, for example a handling charge on cash-on-delivery orders or a surcharge above a certain cart value. Those are fees, not GST, and core has no rule engine for them. For that case you can look at adding conditional fees at checkout with the WooCommerce Extra Fees plugin.
WooCommerce Extra Fees
Make profits from every confirmed sale through smart, conditional fees.
14-day, no-questions-asked money-back guarantee.
Conclusion
Setting up GST in WooCommerce is a native job. Enable taxes, create one tax class per slab, add the rate rows for India and your states, assign products, and pick inclusive or exclusive display.
That covers calculation, shipping tax, and reporting without any GST plugin. Reach for an add-on when you need formatted PDF invoices with GSTIN fields, or conditional non-tax fees, which are a separate concern from GST itself.
WooCommerce Extra Fees
Make profits from every confirmed sale through smart, conditional fees.
14-day, no-questions-asked money-back guarantee.
Frequently Asked Questions (FAQs) about GST in WooCommerce
Do I need a plugin to add GST in WooCommerce?
No. WooCommerce includes a full tax engine. Enabling taxes, creating tax classes for your slabs, and adding rate rows covers GST end to end. A plugin only helps for extras like formatted PDF tax invoices or conditional non-tax fees.
How do I set up the 5%, 12%, 18%, and 28% GST slabs?
Add each slab as a separate tax class in WooCommerce > Settings > Tax under Additional tax classes, then open each class sub-tab and insert a rate row for country IN at the matching percentage. Assign products to the right class.
How do I handle CGST and SGST separately?
Add two rate rows in the same tax class for the same location, each at half the slab, named CGST and SGST. Set display tax totals to Itemized so both appear as separate lines on the cart and invoice.
Should I enter prices inclusive or exclusive of GST?
B2C stores usually enter prices inclusive of tax so the advertised price is the final price. B2B stores usually enter prices exclusive and add GST on top. Set Prices entered with tax and the display options to match whichever you choose.
Is GST charged on shipping?
Yes. Set the shipping tax class to “based on cart items” and tick the Shipping checkbox on your rate rows. WooCommerce then taxes shipping at the same rate as the items in the cart.
Why is GST not showing at checkout?
Check that taxes are enabled in Settings > General, that the product has Tax status set to Taxable, that it is assigned to a class with a valid rate row, and that the customer’s address matches the country and state on that row.
Can different products use different GST rates in the same store?
Yes. Each product can point at a different tax class, so a store can sell 5%, 12%, 18%, and 28% items side by side. WooCommerce applies the correct rate per line item.
How do I report GST I have collected?
Go to WooCommerce > Reports > Taxes for a breakdown by rate and period, with CSV export. Each order also stores its own tax detail for reconciliation.