Table of Contents
Do you ship products at a standard shipping fee?
Does that seem irrelevant to you when someone places a big order?
Are you in search of an alternative that will help you have custom-fit shipping rates based on the product/cart/shipment area, etc?
If you just said yes to any one of the above, then you are in the right place. This article will talk about everything you need to have flexible shipping rates for your WooCommerce store.
Introduction
WooCommerce is one of the most popular plugins used by most of the eCommerce leaders. Primarily because it is the extension of the WordPress platform and extends all of the features and functionalities rendered by the same. With WooCommerce, you can themes, plugin, and other extensions of your choice. Put simply, this allows you to make the most out of your online venture.
However, there are a few things that you need to manually work out and fix to turn your store into a revenue-generating funnel. One of these is adding flexible shipping rates. By default, WooCommerce has the tendency to apply a flat shipping rate to all of the products purchased from the store. The amount applied can be prefixed by you but it remains the same regardless of the customer, the product, the cart value, etc.
If you are wondering whether you need to change this, the answer is yes.
Suppose that your store charges $2 as a shipping fee for a single product. No matter if the product is a t-shirt or a jacket or a pair of trousers. Also, the number isn’t considered when deciding the rates.
Let us understand this through a simple example.
Stacy is a new visitor and has just registered as a user on the website. She performs a search operation for a hoodie, swipe through a few choices, and adds one to the cart. She buys the product at $17 (say the hoodie was for $15, plus the shipment fee).
A few days later she revisits the store to buy the same hoodie but this time she needs to make a bulk purchase (say 20 hoodies).
She clicks on the product page and adds 20 hoodies to the cart. The final value sums down to $380. Stacy now abandons the cart and leaves the website.
Have you wondered why?
It is because of the hefty shipment charges levied during the checkout process. $80 as the shipment fee is not just too much but also unrealistic and hence, you need to optimize your website so that it can have flexible shipping rates. And it is not just for the quantity of the product but the condition could be anything from the shipment region to the cart value, the user, and the payment method chosen.
Having shipping rates that adjust according to the products added, the country to be shipped, the cart value and the user role helps you give your customers the provision of royal shopping. Wondering how can you add such a feature to your WooCommerce store?
Don’t worry, we will help you with this.
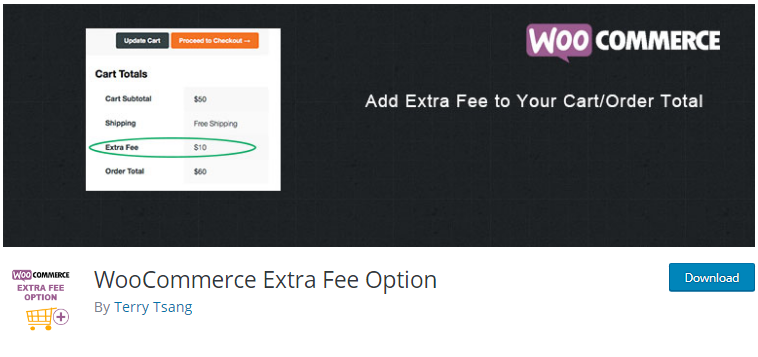
The WooCommerce Extra Fee Plugin is one that you need to install and configure within your online store.
What is WooCommerce Extra fees Fees Plugin?
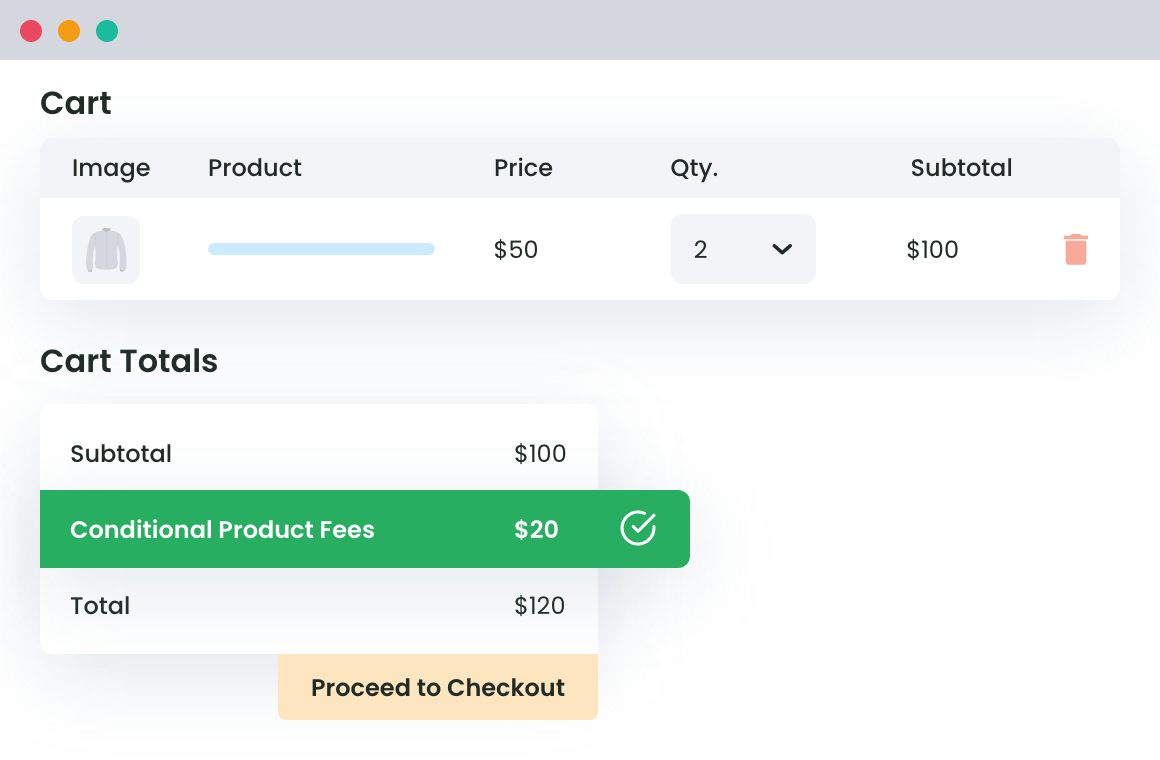
WooCommerce Extra fees Fees Plugin is one that allows you to set up different rules or conditions that would determine the shipping fees to be applied during the checkout process.
The plugin has tens of categories or rules enabling you to customize your store the way you want.
Without much ado, let’s move ahead to see how can you leverage the plugin to have flexible extra fees for your WooCommerce store.
How to Charge Extra Fee Dynamically In WooCommerce Store?
WooCommerce Extra Fees
Make profits from every confirmed sale through smart, conditional fees.
14-day, no-questions-asked money-back guarantee.
Prerequisites: Installing the plugin
The first thing that you need to do is equip your store with the plugin. You can either download it from the official website of Dotstore or visit the WordPress admin dashboard to locate the plugin and download it.
Steps to Download The Plugin:
- Login to the WordPress dashboard using the appropriate credentials.
- Now, scroll down to the Plugins tab
- Click on add new and in the search bar enter WooCommerce Extra Fees Plugin.
- The new page will have the plugin. Click on download now. Alternatively, you may use this link too.
- After the plugin has been successfully downloaded, you would then need to install and activate the same.
Note: In case you have already downloaded the plugin from Dotstore, click on upload in the plugin page. Here also, you would need to activate the plugin to get started.
Configuring the Plugin
The next step to set up flexible rates is plugin configuration. Scroll down to the plugin and click on the WooCommerce Extra Fees Plugin. The page that opens will have multiple tabs. The first one is to manage product based on extra fees. Since we are here for the first time, you will not have any record created.
There are two types of extra fees you may add:
- Fixed – a value in Euros that won’t change for any case (e.g. 10 Euros, 5.25 Euros)
- Variable – a value in percentage that will vary according to the cart/product value.
Switch to the Add Product Fees. This is where you will add rules to decide the shipping rate for the product. Let see how we can do that.
- Status: This toggle is to activate a particular plugin. In case you have created a product fee rule but want to run it for a particular time, you can toggle off the switch to deactivate the rule.
- Product Fee Title: Add a custom-fit name for your product fee rule. This will help you differentiate between the different rules created for the store.
- Select Fee Type: The rule allows you to apply product fee based on the:
- Fixed value: in case you want to have a fixed rate applied to the cart, you will choose the fixed value.
- Percentage: to apply a significant percentage of the cart value as the shipment fee, select percentage.
- Fees: Enter the amount or the percentage to be charged as the fee.
- Apply per quantity: For bulk orders, you can have a fixed value for order along with a per quantity fee to be added with respect to every product added. For example, You can have $2 as the base rate and $0.2 as the per quantity fee for bulk orders. This will help keep the shipping rates minimal.
- Tooltip Description: Add a short description of the product fee and the rule created.
- Start/End Date: For product rules that are run for a specific time period, you can enter the start date and the end date. Like if you have created a Christmas offer, enter the dates between which you would have the product fee applied.
- Amount Taxable: This is to specify whether or not the shipping fee is subject to taxes.
Next is the Conditional Fee Rule. To help you get a better idea of how the plugin works, we will resort to hypothetical examples.
Case One:
Set $12 for products shipped to Costa Rica, Cuba & Cook Islands.
Suppose that you are now expanding overseas. It’s been one month and you found that shipping to certain regions cost you more than the standard prices. In order to cover up for the charges, you decide to increase the shipping rates.
The WooCommerce Extra Fees Plugin will help you do this without any hassle. To get started, you would need to first configure the plugin following the steps given above.
- Name the product fee title as country-based shipping rates.
- Select Fee Type to be fixed.
- Add product fee as $12.
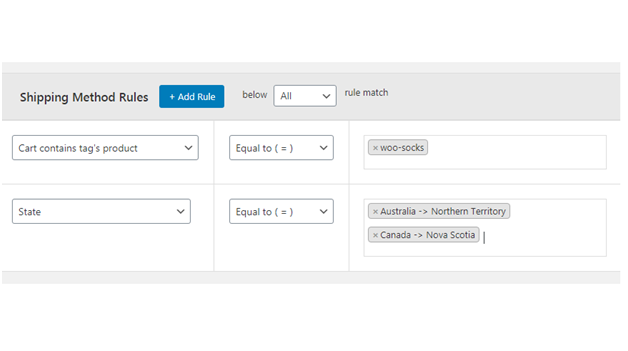
Now move down to the Conditional Fee Rule.
- Click on add row.
- In the first box, select the country.
- Next, click on equals to.
- In the last box, enter countries Costa Rica, Cuba, Cook Islands.

Move down and click on save. You can perform a test order to verify the above.
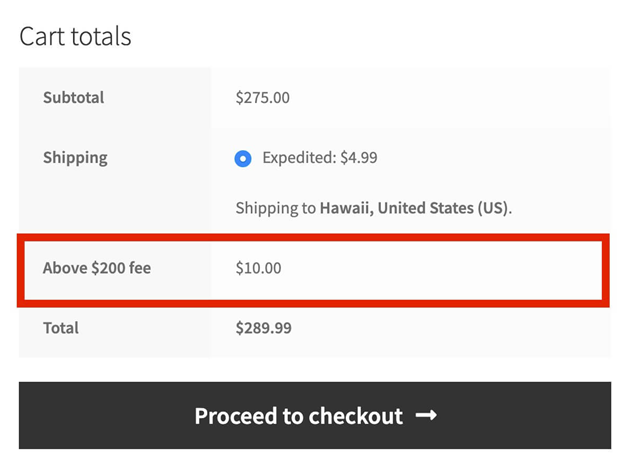
Case Two:
Set 10% as a shipping fee for orders of value more than $400 and from countries Costa Rica and Cuba.
This example has two different rules to be created. Here again, we would need to first configure the plugin. Follow the steps given below to add the product fee rule.
- Name the product fee title as cart value-based shipping rates.
- Select Fee Type to be variable.
- Add product fee as 10 (percent)

Now move down to the Conditional Fee Rule.
- Click on add row.
- We will first add the value rule.
- Click on the drop-down and select cart value.
- Next click on the equals to and in the last box enter $400.
We now need to create the second rule. Once again click on add row.
- In the first box, select the country.
- Next, click on equals to.
- In the last box, enter the countries as Costa Rica, and Cuba.
Move down and click on save. You can perform a test order to verify the above.
Note: You can add as many rules as needed to set up a condition. Also, remember that you can have a time-restricted rule created. For instance, if the above offer is to be activated only for the ongoing month, you can add the current date as the start date and the last date of the month as the end.
Conclusion
Extra Fees Plugin For WooCommerce is a smart way to configure your eCommerce store to charge additional fees from the customers. With it, installing on your shop, you won’t have to get any custom features developed for this purpose. This WooCommerce extension is powerful enough to handle everything you might want to do through it. So, start using it as soon as you feel to need.
WooCommerce Extra Fees
Make profits from every confirmed sale through smart, conditional fees.
14-day, no-questions-asked money-back guarantee.