Table of Contents
WooCommerce is definitely one of the best platforms to start your online store. Given the fact that it is layered upon the WordPress website, it has access to all of the features and functionalities rendered by the same. WooCommerce, itself, has an array of features offered that gives you the ease to run a fully customized online store.
However, that’s not enough. When we talk about the shipment and delivery charges, WooCommerce is limited in the sense that it allows a flat rate shipping method. Now, what does this mean?
Flat rate shipping method is one where, irrespective of what the user has added to the cart or what is the delivery location, the store would levy the same charges everywhere. Imagine a hypothetical situation where you plan to provide free shipping to your customers. Now, this would definitely benefit the customers as none of the e-commerce stores offer free delivery to all.
But is this beneficial to you?
Two customers one buying a product worth £500 and the other paying £96 are entitled to free delivery. Regardless of the fact that shipment cost incurred is different and probably higher in one of the cases, keeping a fixed or free delivery isn’t justified. You need to add flexibility within the store so that it can determine what to charge and when.
If you are not sure how we introduce the WooCommerce Additional Fees Plugin that will help you create rules to add variable fees during the checkout process.
Before moving to the core of the plugin, let’s have a quick look at why would you need to add extra fees during the checkout process?
Why Do You Need The Plugin for Charging WooCommerce Extra Fee Based on Country and State?
Say you are operating in Rio De Janeiro in Brazil. Your business is around 5 months old and now you have planned to take your business beyond the state. Until now, the store offered a flat rate shipping charge of £3 to buyers all across Rio de Janeiro. However, since you are now expanding to different places, the shipping cost would be more, and sticking to the £3 count would lead to the loss.
What you need to do is customize the store operations in a way that whenever a customer outside Rio De Janeiro places an order, an additional fee is charged against the same.
If you stick to the basic settings of WooCommerce, doing this is not possible. You will either have to charge everyone £3 or increase the same for all. Even though it sounds good, this is not the best way to operate. Considering that they are multiple WooCommerce stores if your store has higher prices, customers are bound to make a shift. Hence, the need for a plugin that allows you to optimize the store in the best possible way.
WooCommerce Additional Fees Plugin is one such option embedded with the feature of rule-based shipment charges. This is a premium plugin, allowing store owners to create as many rules as required to set up flexible shipping rates. Without much ado, let’s move ahead to see how can you use the plugin to charge extra fees based on country and state.
How to set up WooCommerce additional fees plugin?
Using the WooCommerce Additional Fees Plugin is pretty easy and can be configured in a series of steps.
To begin with, follow the steps given below. We assume that you have already downloaded the plugin.
WooCommerce Extra Fees
Make profits from every confirmed sale through smart, conditional fees.
14-day, no-questions-asked money-back guarantee.
- Move to the WordPress dashboard and scroll down to the plugin section. You will find the downloaded plugin here
- Click on it to install the same. Next, activate the plugin.
- Once activated, click on the plugin name on the left side of the dashboard.
The plugin page opens up and has a series of fields that will help you create your very first WooCommerce product fee. Click on Add New Product Fee.
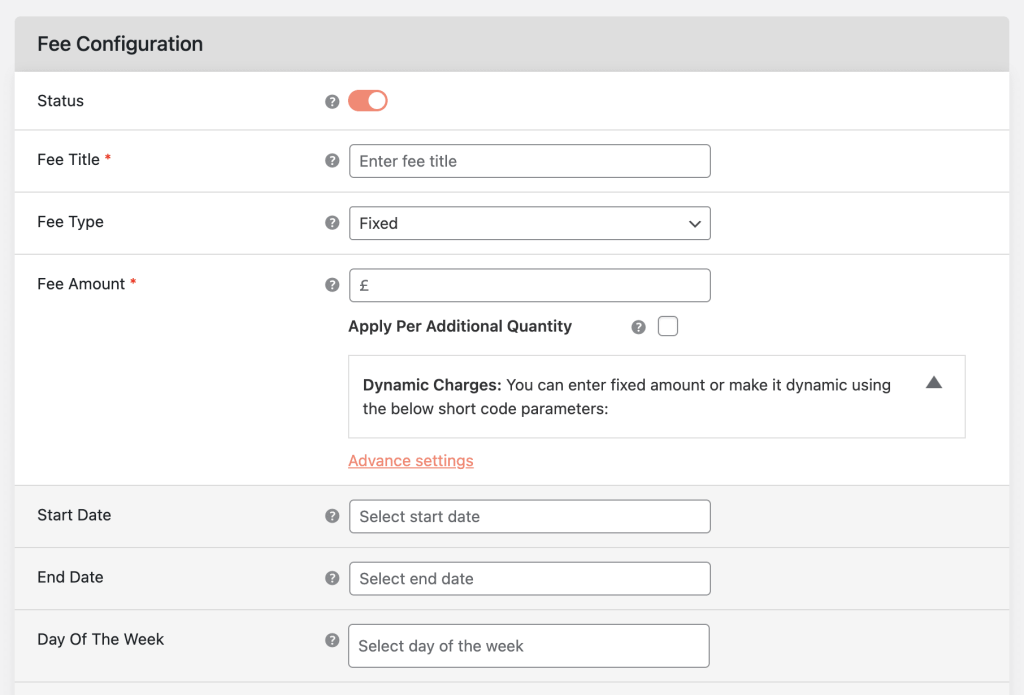
- Status
The first tab is about whether the current rule is functional or has been deactivated. Since we are creating your first product fee rule, switch on the toggle to indicate it’s active status.
- Product Fee Title
This is naming the rule created by you. When you save the rule, this would appear in the manage product fee section helping you identify the same. This is not visible to the customer and is solely for your own perusal.
- Select Fee Type
The WooCommerce Additional Fees Plugin gives you the flexibility to add charges either as a fixed flat rate or a percentage of the final cart value. For instance, if you want to charge 7% of the final cart value as the shipment fee, you can select the percentage-based model from the drop-down.
- Fees
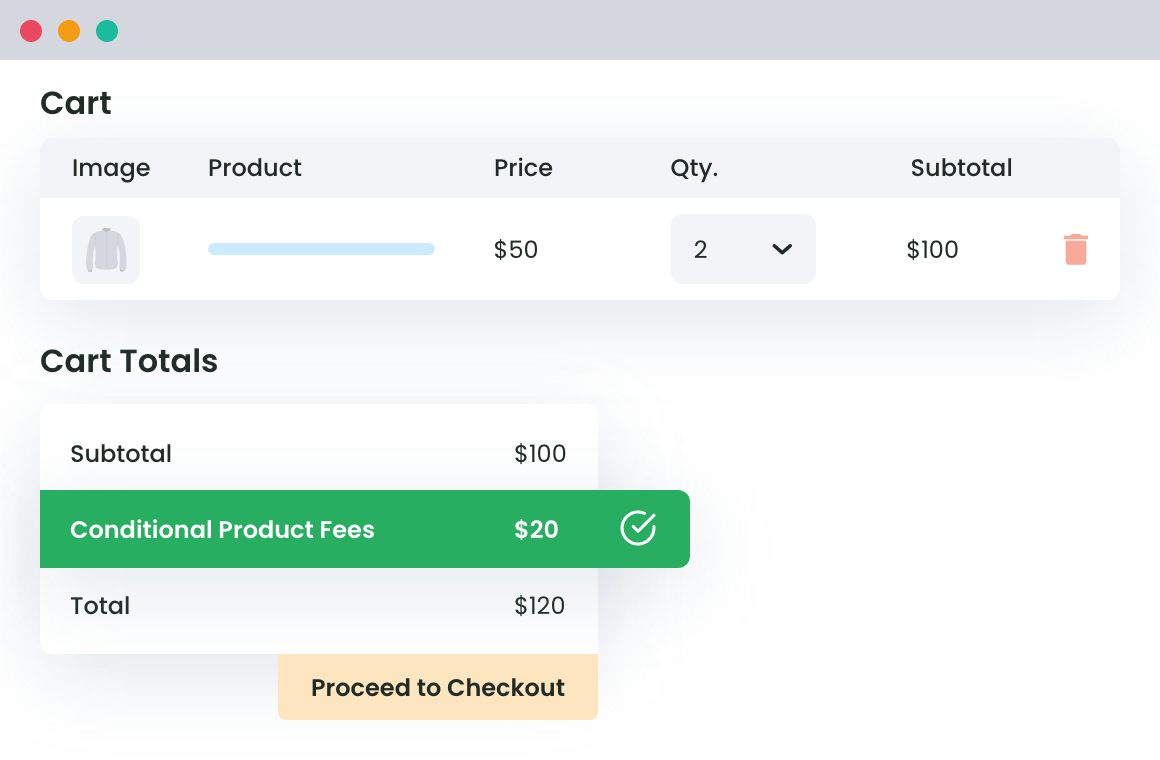
The fee determines the amount to be charged or the percentage, in case you have opted for the same. The plugin has advanced features and gives the freedom to add shipping cost based on the total quantity in the cart or the product added to the cart. Consider a situation where you want to levy £2 as a shipping fee on every product added to the cart. If a user adds four hoodies, he/she would be entitled to pay £8 as the shipment fee. A similar goes for Cart based shipping.
- Tooltip Description
This section allows you to provide a detailed outlook on the created product fee.
- Start Date
In case you have created the additional fee offer for a specific time period, you would then need to provide a buffer to the plugin. The Start date is where you enter when do you need to rule to apply.
- End Date
A final date specifying when the rule seizes to exist.
- Is Amount Taxable
If you want the shipment fee or the additional fee added in the checkout page to be taxed, click on the drop-down and select yes. Else, select no.
These were the basic settings you would need to change when creating rules to charge additional fees during the checkout process. Now, we move ahead to see how to charge extra fees during checkout based on the state and the country.
Flexible Extra fees for WooCommerce
Case One:
Levy £12 For Customers Outside Rio De Janeiro
Extending the situation created above, we consider that you have a WooCommerce Store actively operating and Rio De Janeiro. Now that you have planned to expand your reach and accept orders from buyers outside the state, you would need to have additional fees charged during the checkout process.
To do so, start with creating a product fee and name it something as Shipment Fee For Customers Outside Rio De Janeiro. Since we are putting up a flat rate of £12, select fixed fee type and enter 12 in the fee box. You can add a description or let it remain as it is. The start and end don’t have to be filled and depending upon whether you think the fee is taxable or not, you can select the same.
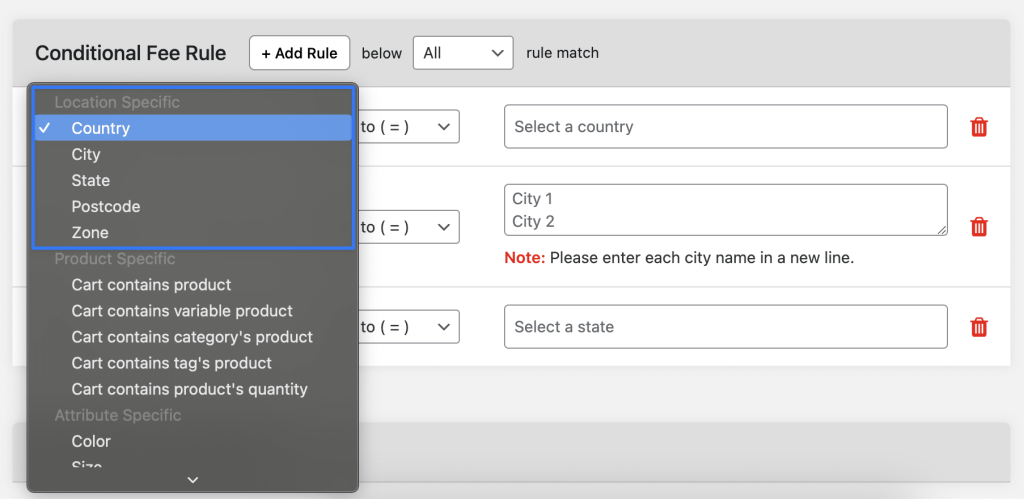
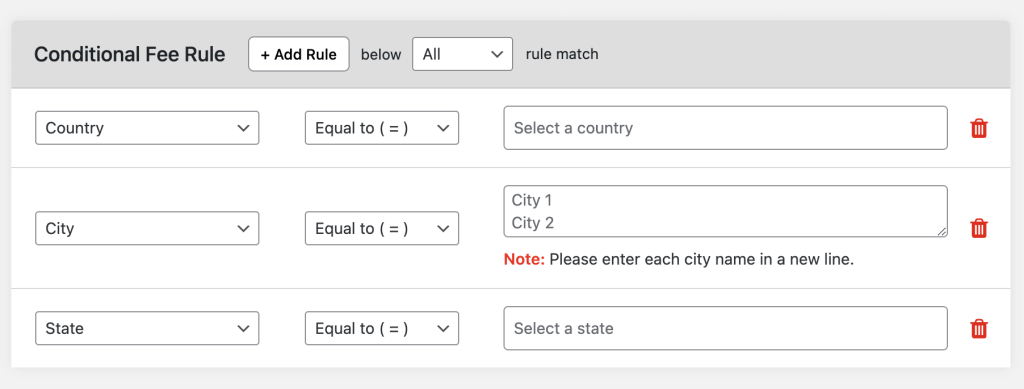
Now to create a rule, move to the Conditional Fee Rule section and click on add row. Scroll down and you will see a row added with three different columns. In the first drop-down, select State. Since we are applying the rule to every other state other than Rio De Janeiro, we will select not equal to. Had there been a single state, would have picked equal to. In the last column, select Rio De Janeiro.
So, the rule would supply when the state is not equal to Rio De Janeiro. Click on save setting to apply the changes and implement the rule.
How to charge an extra fees in WooCommerce?
Case Two:
Free Shipping For Customers Who Are From Brazil and the cart value is greater than £250
The beauty of the WooCommerce Additional Fees Plugin is that it allows you to create one or more rules for the product fee. Suppose that it’s the seasonal sale and in order to increase your in-store sales, you have decided to give your country customers free shipping options if the final value of the cart exceeds £250.
How to charge cart-based extra Fee in WooCommerce?
To go ahead with this, we first need to implement the settings. Add the product fee title as Free Shipping For Customers in Brazil. Now, move down to select the fee type as fixed and then enter £0 in the box. Free shipping means you are not charging anything and so the value to be added would be zero. You can add the start and end date to indicate when the offer would go live.
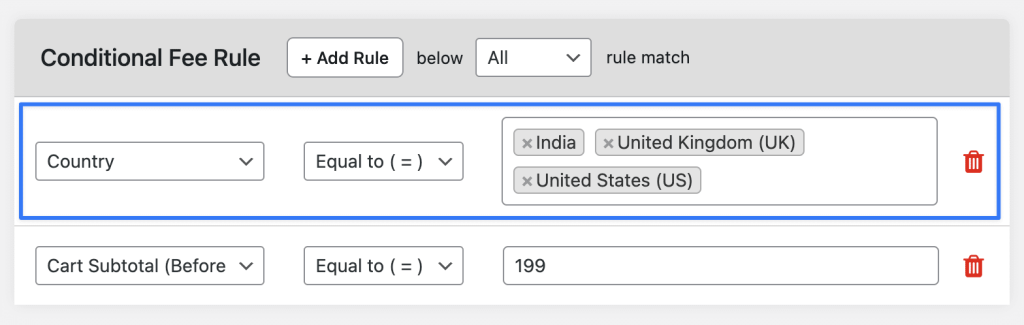
Next, move down to add two rows in the section. In the first row, click on the drop-down and then select the country. In the adjacent box, select equal to. In the last column, type Brazil, the name would appear click on it and done.
To apply the second rule, click on the drop-down on then select cart value before tax, next equal to and then enter the amount 250. Make sure you have selected all in the drop-down adjacent of the add row section to apply both the rules together. Click on save settings and you are done.
Queries? Ask us.
WooCommerce Extra Fees
Make profits from every confirmed sale through smart, conditional fees.
14-day, no-questions-asked money-back guarantee.