Table of Contents
In this in-depth tutorial, I’ll walk you through the steps to integrate Stripe with WooCommerce (complete with helpful screenshots!) so you can start accepting payments via multiple methods in your online store — zero coding required.
Stripe is a solid choice to enable your customers to pay you securely. More than 800 thousand WooCommerce stores use Stripe to process payments from customers all around the world. (Source: WordPress plugin directory).
Whether you’re about to launch your WooCommerce site and want to accept payments using Stripe or are looking to switch payment gateways, this tutorial has your back.
Here, I’ll walk you through the steps to link Stripe and WooCommerce. I’ll also answer some common questions about Stripe and other payment processors like WooPayments and Square to help you determine the best payment gateway for your online store.
Let’s kick off with a quick overview of the benefits of using Stripe to accept payments in your WooCommerce store.
Why connect WooCommerce with Stripe?
When planning to start an eCommerce business, the WooCommerce plugin happens to be one of the best choices to move ahead with. Apart from the fact that it simplifies the process of site creation, it comes along with an array of other integration support. Whether you wish to process information and analyze sales or embed automation to strategize your approach, WooCommerce never fails to surprise.
In case you have an eCommerce site built or are planning to deploy one, you would need all sorts of integration tools. Of these, the one that is most important and urgent for your store is the payment processing platform. This article is specifically designed to educate you about the vividly popular WooCommerce Stripe integration and further outline the steps you must take to integrate the same within your online store.

Stripe, as mentioned above, is a WooCommerce payment gateway and probably one of the most reliable online payment services. It is entrusted with the security and tailored to help business professionals simplify the manner in which they facilitate online transactions. Running an online business requires one to be flexible in terms of features, and the WooCommerce Stripe plugin supports multiple payment methods, ensuring that being limited to a single payment option does not hinder sales.
We thrive in a customer-first era, and customization is important for businesses to see the light of the day. Imagine having an online store that supports only debit card payments. For a customer that prefers credit card payments for online transactions, this limitation forces the user to switch to a different site. Irrespective of how authentic your products are, if a customer fails to find an ideal way to pay, he/she is most likely to make a switch.
After all the pain you took to market your products, attract prospects, and convert them to leads, you failed to drive revenue. Who on earth would want that, right?
What makes Stripe an ideal choice for the WooCommerce payment gateway is its security, user-friendliness, and cost-cutting features. The Stripe gateway plugin follows all security protocols and is equipped with the power to detect fraudulent activities. Further, all data shared and transferred via the gateway is kept secure. The transaction itself is encrypted to prevent any sort of hearsay. Recent updates saw the integration of Cryptocurrency as an added security support in the platform.
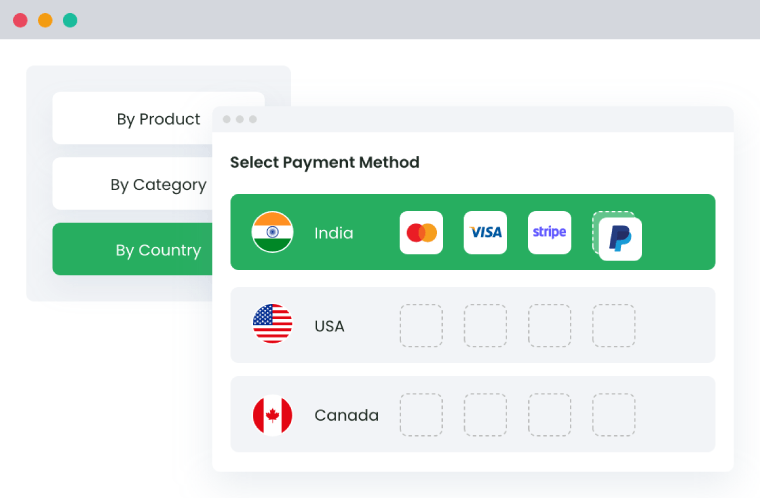
Besides, the WooCommerce stripe payment gateway is tossed with various features that add to its popularity. With the ability to implement a payment request button, it enhances the checkout experience, allowing customers to pay quickly and efficiently.
- Allow payment via Google Pay and Apple Pay.
- An intuitive stripe dashboard provides in-depth details on the sales and transactions made given a particular time period.
- Enables keeping track of any or every product that is sold through the portal.
- Intelligent tools and reports that promote data analysis.
- Debugging features to ensure hassle-free payment via the gateway.
- Recurring payments, easy refunds, and the optimized checkout experience.
In a way, Stripe for WooCommerce enables website owners to adapt to the dynamics of the e-commerce business and remain at the forefront of customer expectations.
How to integrate Stripe with WooCommerce
Wondering how to integrate this excellent payment gateway within your WooCommerce store?
Stripe For WooCommerce is one of the versatile payment plugins accepting currency via all standard debit and credit cards. The plugin also facilitates Apple Pay and Bitcoin currency for validating a transaction. All in all, it is the best payment gateway to consider for your WooCommerce store.
Considering that you already have a WooCommerce website designed and deployed, you would need a WooCommerce gateway stripe plugin to set up flawless payment options within your store. You can download the same Woocommerce gateway stripe.
Here’s an overview of the steps to connect Stripe with WooCommerce:
The entire tutorial comprises four steps, including downloading, installing, and configuring the woocommerce stripe plugin to start accepting secure payments via the stripe gateway.
- Add WooCommerce Stripe Payment Gateway to your site
- Connect WooCommerce and Stripe
- Configure advanced WooCommerce-Stripe settings
- Live test your WooCommerce Stripe payments connection
Prerequisites for adding Stripe to WooCommerce
Before we begin the guide to installing and integrating Stripe, here is a checklist that you need to follow. Once you have covered the items mentioned below, you will be prepared to integrate Stripe.
- If you have yet to set up your WooCommerce site, begin by creating a WordPress account. Download and install the WooCommerce plugin, and then follow the steps below to install and configure a Stripe payment gateway for your store.
- Create a Stripe Account. Visit the official
page of Stripe to fill out the registration form and create your account. - Enable HTTPS for the website
Step One: Add WooCommerce Stripe Payment Gateway to your site
The first thing that you need to do is download the plugin. To do this,
- Login to your WordPress admin dashboard using the credentials (username & password).
- Navigate to the left corner of the screen and locate Plugins.
- Click on the tab and then select Add New. This opens a new page.
- Here, you will see a search bar. Type: WooCommerce Stripe Payment Gateway and click enter.
- Click on the install tab just below the WooCommerce plugin.
- Once done, click on activate plugin.
Note: In case you have already downloaded the plugin, click on the upload plugin, and then activate
the same.
After activating the plugin, visit the WooCommerce tab and click Checkout. If the activation process has been successful, you will see Stripe as one of the payment preferences.
Step Two: Connect WooCommerce and Stripe
Here, we will set up the WooCommerce store to accept payments via Stripe.
- Go to Stripe.com/register and create a business account. Important: You must create a business account to generate your Stripe API keys which will be needed later on. Make sure you stay logged in to Stripe and keep the tab open.
- In your WordPress dashboard, navigate to WooCommerce > Settings and click on the Payments tab.
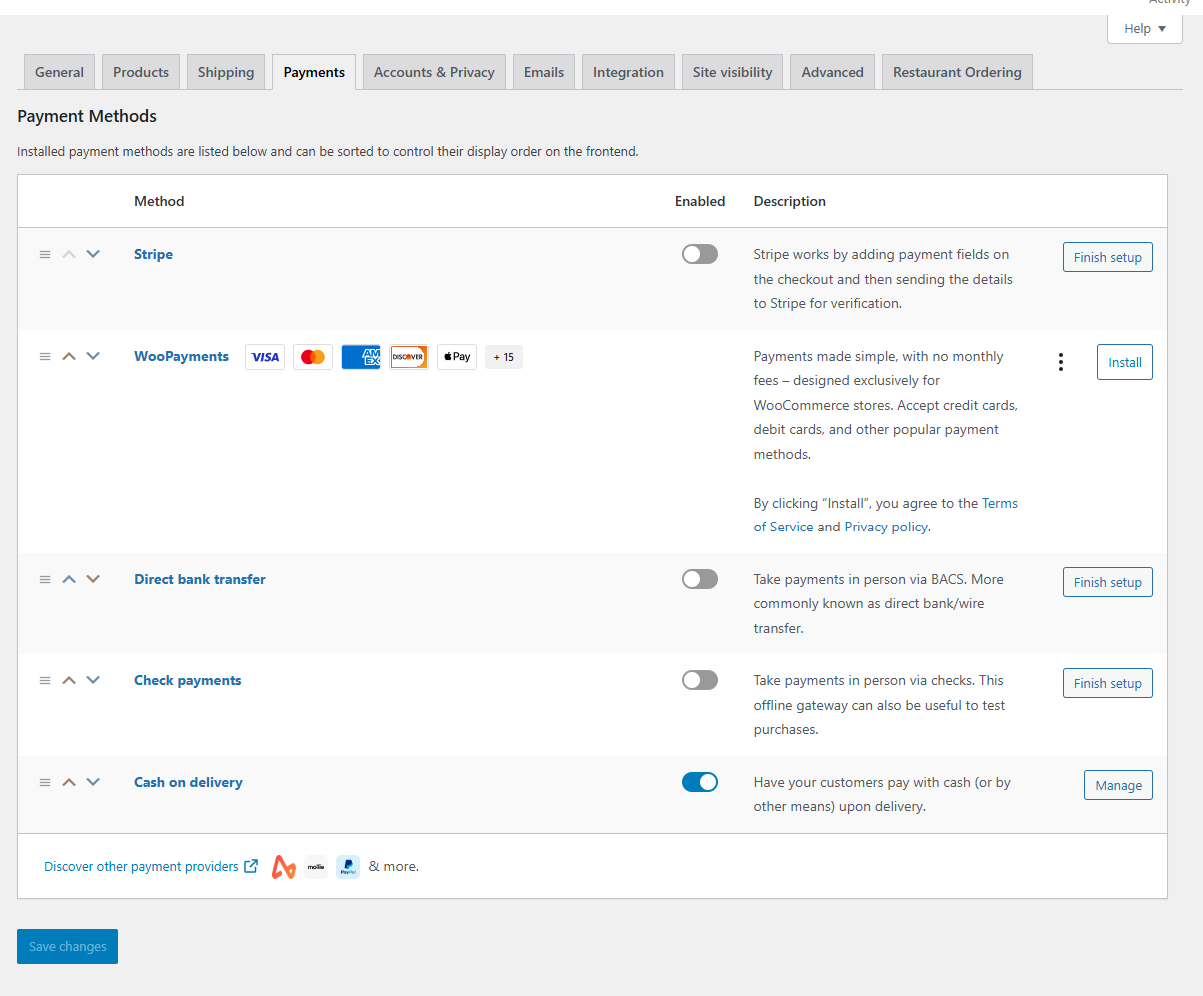
- On this page, you’ll see a list of available payment methods. Locate the “Stripe” option and toggle on the “Enable” option. Then click on “Finish setup”.
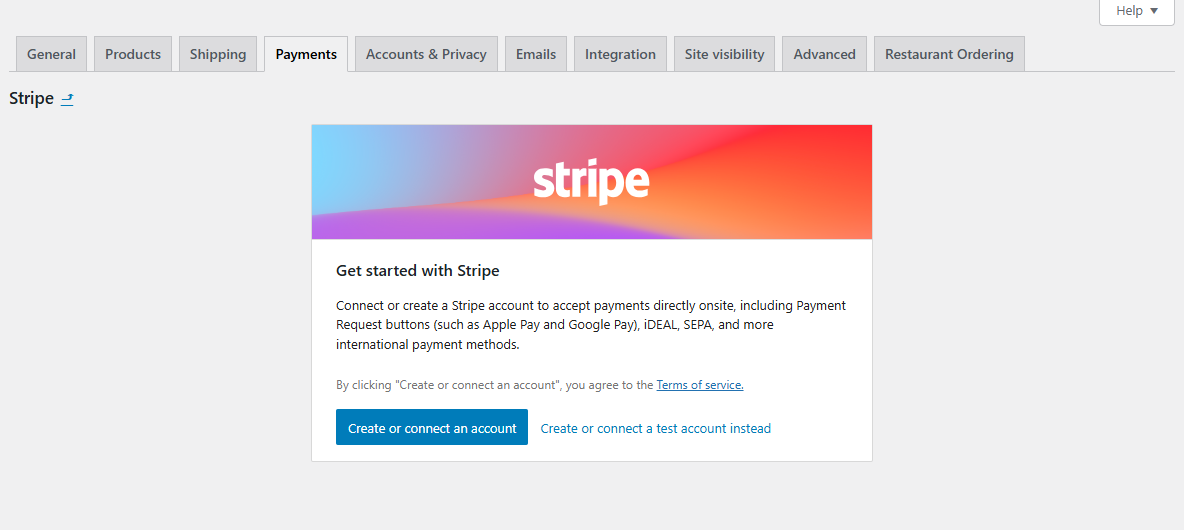
- Click on “Create or connect an account” to integrate Stripe with WooCommerce.
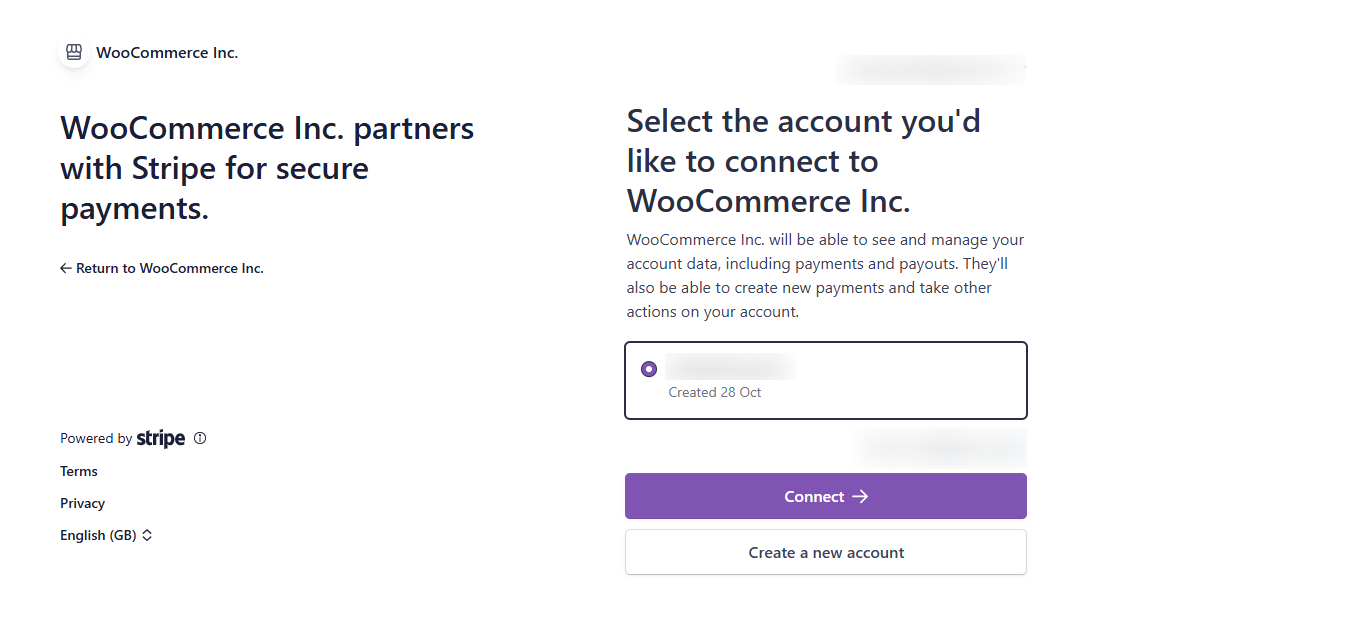
- This will redirect you to the official Stripe website. If you remain logged into Stripe, as mentioned earlier, you can select the account you wish to connect to this WooCommerce site and click on the connect button.
- This should automatically connect your Stripe Publishable and secret API keys with WooCommerce. If this isn’t automatically synced:
- In your Stripe dashboard, select the Developers tab from the top menu. Locate the “Live Publishable Key”, copy it, and add it to your WooCommerce site.
- In your Stripe dashboard, click on “API keys” and send a one-time code to the mobile number you used to register for Stripe. You can then enter the one-time code to generate a new secret key. Once generated, copy and paste the secret key into your WooCommerce site.
- You’ll have to connect to the live webhook manually. To do this, copy the webhook endpoint URL from your WooCommerce site. Then, go to your Stripe dashboard. Navigate to the Developer tab, click on “Webhook”, and select the “Add Endpoint” button.

- Paste the endpoint URL copied from your WooCommerce site in the “Endpoint URL” field, and add a short description for this webhook.
- Click on “Select Events”. Then navigate to the “Charge” section, and select all the charge events. Then click on the “Add Event” button.
- Scroll to the bottom of the page and click on Add Endpoints.
- Once the endpoint is created, click on Signing secret. Copy and paste the signing secret key into the webhook secret field in WooCommerce.
- Finally, click on “Save live keys”.
Step Three: Configure advanced WooCommerce-Stripe settings
In this section, I’ll walk you through some key settings for your WooCommerce Stripe integration.
- Go to WooCommerce > Settings > Payments > Stripe > Manage, and scroll down to the “Payments & transactions” section.
- In the Payments section tab, click on “Enable Payments via Saved Cards”. This saves customers from having to type in their card details every time they place an order using the same card on your site.
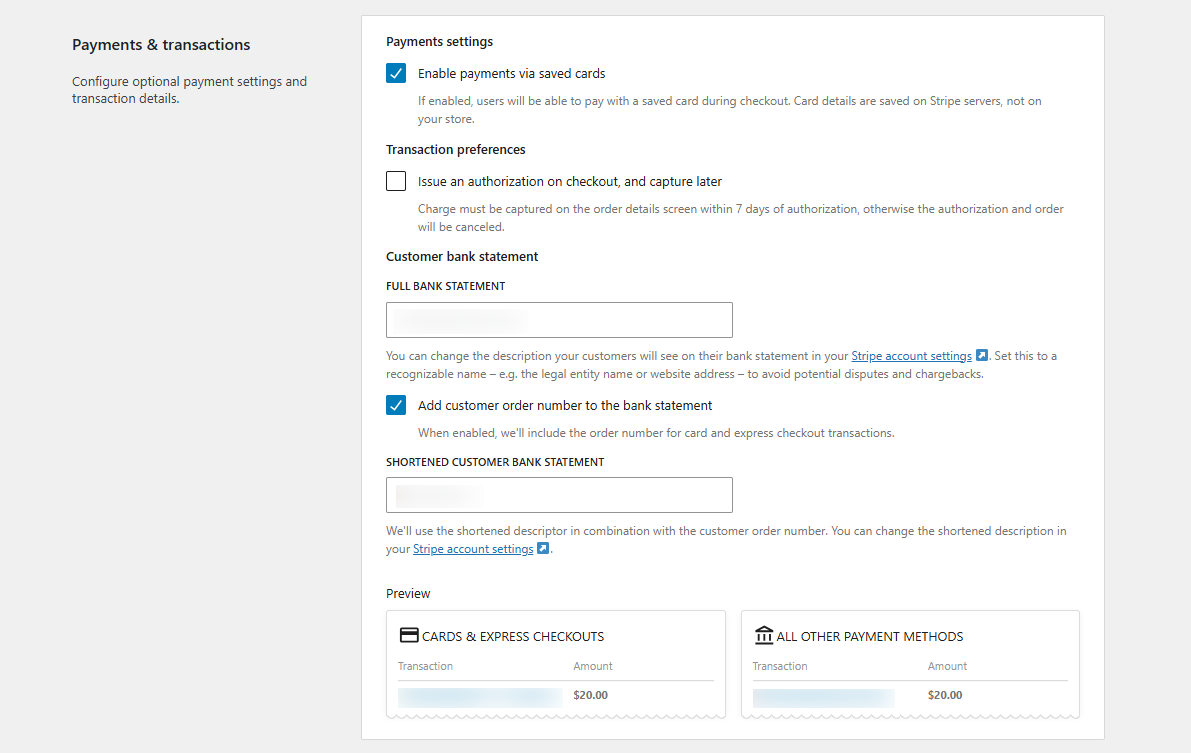
- Verify that the business name in the “Customer bank statement” section is accurate. This avoids confusing customers about the charge when it appears on their bank statements. This information is auto-populated from what you set up in Stripe. So if it is incorrect, head over to your Stripe dashboard and correct it.
- Suppose you tick the “Add customer order to the bank statement” option. In that case, you can see a shortened version of your business name, combined with the specific order number generated in WooCommerce for each completed purchase.
- Then scroll down to “Advanced settings” and enable the “Log error messages” option in the Debug mode section. This will save the keep track of payment errors in your WooCommerce site’s log so you can troubleshoot and fix them.
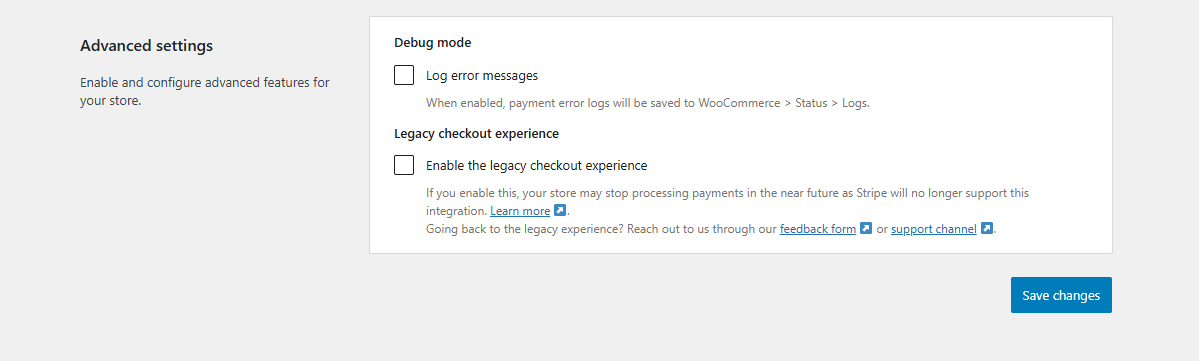
- Finally, save your settings at the bottom of the page.
Step Four: Live test your WooCommerce Stripe payments connection
The last order of business is to test your WooCommerce-Stripe payments live setup and confirm that everything works as it should. I recommend you create a product for $1, then go to the front end and place an order just as a customer would.
Then, once you’ve placed the order, head back to your Stripe dashboard to confirm that the payment has been received. To do this:
- From within your Stripe dashboard, click on Payments from the left menu.
- Scroll down to view the list of payments, and check for the transaction you just completed.
A quick note: If you’d like to test your WooCommerce-Stripe payment setup in a sandbox environment, you can enable test mode within your Stripe account. Scroll down for step-by-step instructions on how to do this.
FAQ about how to connect Stripe with WooCommerce
Here, I’ll answer some common questions about WooCommerce Stripe integration.
Is Stripe free with WooCommerce?
Yes, Stripe is free to use with WooCommerce. There are zero upfront costs, monthly subscription fees, or hidden setup costs. But, similar to other payment gateways, transaction fees will apply when you use Stripe to process payments on your WooCommerce store.
Here’s a quick overview of Stripe’s transaction fee structure:
In the U.S., the standard fee is 2.9% + 30¢ per transaction for domestic card payments. Payments made through international cards usually incur an additional 1.5% fee. And there’s an extra 1% conversion fee for transactions involving currency conversion.
However, the precise rate might vary based on factors like your location, payment type, and the country where the payment originates.
If, for example, your WooCommerce store processes $10,000 per month in sales, all from domestic card payments. In this case, Stripe’s transaction fee would be $320 (2.9% + 30¢ per transaction).
Compared to traditional payment processors, Stripe is super cost-effective, but it’s still important to factor in the transaction fees when planning your store’s pricing structure and profit margins.
What is the best Stripe plugin for WooCommerce?
The best Stripe plugin for WooCommerce is the WooCommerce Stripe Payment Gateway plugin. As the official plugin developed by WooCommerce, it is packed with tons of useful features, is reliable, and integrates seamlessly with WooCommerce.
WooCommerce Stripe Payment Gateway lets you accept payments via a wide range of payment methods, including:
- Visa, MasterCard, Discover, American Express (Amex), and other popular debit and credit card issuers.
- Apple Pay and Google Pay for smoother mobile checkout experiences.
- Alipay, SEPA Direct Debit, and iDEAL; which are crucial if you sell to customers across various countries.
Is WooPayments cheaper than Stripe?
No, WooPayments isn’t cheaper than Stripe. Both services are closely related — WooPayments is actually built on top of Stripe’s infrastructure, so you’ll notice nearly identical pricing structures and rates.
Here’s a detailed overview of WooPayments and Stripe fees:
- Transaction fees: Both WooCommerce Payments and Stripe charge a base rate of 2.9% + 30¢ per transaction for most U.S.-based credit and debit cards. Also, there is a 1.5% surcharge for international cards and an extra 1% fee for currency conversions.
- Payout fees: Instant payouts are handy for situations where you need faster access to funds. Both WooCommerce Payments and Stripe charge 1.5% (minimum 50¢) for instant payouts to your bank account outside your standard payout schedule.
Is Stripe or Square better for WooCommerce?
Stripe and Square are robust payment gateways. However, Stripe is generally the better option for most WooCommerce stores.
Stripe is an online-first payment gateway. It is purpose-built for online transactions and supports a wide range of payment methods, such as credit/debit cards, Apple Pay, Google Pay, international options like Alipay and iDEAL, and others. Plus, it offers subscription billing, customizable payment forms with Stripe Elements, in-depth analytics, and other advanced options that can significantly boost your store’s revenue. This level of flexibility is ideal for increasing conversion rates and can help you reach a wider customer base.
Square, on the other hand, is primarily built for brick-and-mortar businesses that want point-of-sale (POS) capabilities alongside their online store. While it does integrate with WooCommerce to manage both in-person and online payments, it doesn’t support as many payment methods as Stripe. This can severely hinder your business’ growth if you’re targeting customers worldwide.
In a nutshell,
- Stripe is best for online-first WooCommerce stores that plan to sell to customers located all around the world.
- Square is best for hybrid WooCommerce stores with both an online and physical presence, that want to sync inventory and sales data between their online and in-person operations.
How do I test Stripe payments in WooCommerce?
Follow these steps to test secure payment methods with the WooCommerce Stripe integration in Stripe’s test mode.
Step 1: Create a Stripe test connection
- Go to Stripe.com/register and complete the steps required to create a business account. Important: You need a business account to be able to generate your Stripe API keys. Remain logged in to Stripe and keep the tab open.
- Add the WooCommerce Stripe Payment Gateway plugin to your website.
- In your WordPress dashboard, navigate to WooCommerce > Settings > Payments.
- This page lists all the available payment methods. Find and enable the Stripe option, then select “Finish setup”.
- Click on “Create or connect an account”. This will redirect you to the official Stripe website so you can integrate Stripe with WooCommerce.
- If you are still logged into Stripe as mentioned earlier, you can select the account you wish to connect to this WooCommerce site and click on the Connect button. This should automatically connect and sync your Stripe account and WooCommerce website.
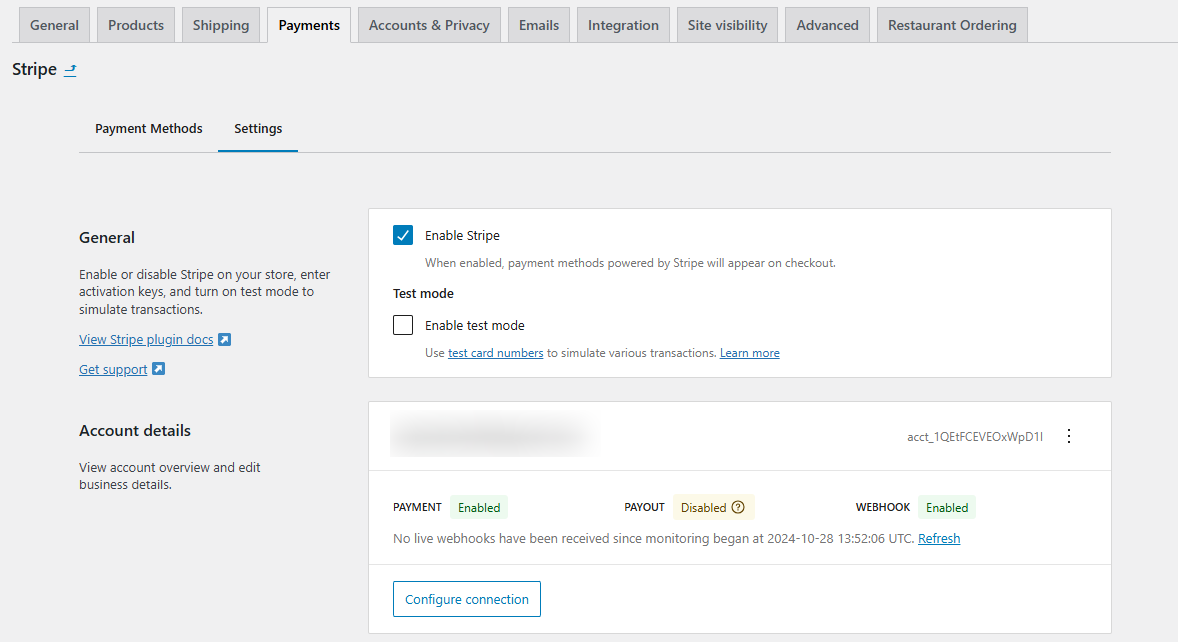
- From WooCommerce > Settings > Payments > Stripe > Settings, enable the Test mode checkbox from the “General” section.
- Scroll to the Account details section and copy the webhook endpoint URL onto a notepad. Then click on the “Edit account keys” button to open up a modal window.
- Head back into your Stripe dashboard and toggle on the Test mode button from the top of the screen.
- Select Developers > API keys and copy the Test Publishable Key. Then head back into WooCommerce and paste it into the Test Publishable Key field in the modal window.
- Repeat the same with the Test Secret Key — copy it from your Stripe dashboard to the Test Secret Key in WooCommerce. Scroll down the modal window in WooCommerce and save the details.
Step 2: Save the credentials and test Stripe payments in WooCommerce
- Head back into your Stripe dashboard, and go to Developers > Webhooks.
- Copy the webhook endpoint URL you added to a notepad earlier and click on Add Endpoint.
- Update the webhook endpoint URL in the endpoint URL field and add a short description of what the webhook endpoint is for.
- Click the “Select Events” button, scroll to the Charges section, and then click on Select All Child Events > Add Events.
- Once done, scroll to the bottom of the page and click on “Add endpoints”.
- Reveal then copy the newly generated Signing Secret key.
- Head back to your WooCommerce site and paste the Signing Secret key into the Test webhook endpoint field in the modal window.
- Scroll down and click on “Save test keys”.
- Reopen the “Edit account keys” modal and navigate to the Test Mode tab. Then click on “Test Connection” at the bottom of the page. It’ll show you the “Connection successful” message if everything works as expected.
- To verify that the test connection works as expected, go to your site’s front end, add products to your cart, and proceed to the checkout page.
- Enter the required information (contact and shipping information) to complete the order on the checkout page. When you reach the payment options section, select Credit / Debit card and enter the test card number Stripe provides. Important: Make sure you enter a future expiration date.
- You can tick the checkbox to save the test details for future use.
- Scroll to the bottom of the page and click on Place Order.
- Now you can head back to Stripe to verify that you’ve received the payment. To do this, click on payments on the left dashboard and go down the page to see the test transaction that you just completed.
Connect WooCommerce and Stripe today!
Stripe is a top-tier payment gateway. And if you’ve followed the steps in this tutorial, you’ll have successfully linked your Stripe account and WooCommerce site.
As I showed you in this post, WooCommerce Stripe Payment Gateway is the best plugin to integrate Stripe and WooCommerce. Developed and maintained by WooCommerce’s official team, it is super easy to use and lets you accept via a variety of options, including credit and debit cards, wallets (like Google Pay, Apple Pay, Alipay), Buy Now Pay Later providers (like Affirm, Klarna, Afterpay/Clearpay), and others.
Plus, it includes fraud detection tools, enhanced checkout tools, and tons of useful additional features.
Get WooCommerce Stripe Payment Gateway and link Stripe and WooCommerce in minutes!