Table of Contents
To run your e-commerce store effectively, you should learn to implement advanced shipping methods for every type of location and location set.
If you are using the Advanced Rate Shipping Method for WooCommerce Plugin and do not know how the ones and shipping methods related to zones work, this how-to guide on ‘How to set up WooCommerce shipping method based on Zone?’ is to give you a quick and thorough understanding of it.
Let’s first understand how to create zones and then move to the procedure of creating zone-based methods.
How to Make a Zone?
Follow the enlisted steps to set up and configure your shipping zones:
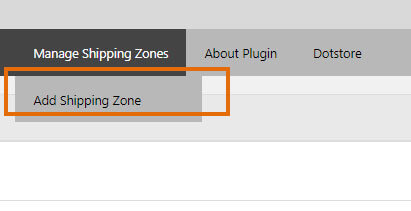
1. To make any zone, first, you must navigate to the ‘Add Shipping Zone’ option and click on it.

2. In the next step, you have to add the name of the shipping zone and choose a zone type.

3. There are three types of zones for managing shipping charges through the rule or rule sets you’ve made:
A. Making The Zone Containing Multiple Countries
The option is ‘THIS SHIPPING ZONE IS BASED ON ONE OR MORE COUNTRIES’. Select it and choose the countries you want:

B: Making the Zone Containing Multiple States
In the same way, you can add multiple states and create their zone. These states may belong to the same country or multiple countries. For a better understanding, see this figure and find the option as shown here:

C. Making the zone comprise different countries and their states.
Advanced Shipping Methods allow you to deal with the clients all over the world. Complete countries and states from different countries can be selected simultaneously to ease your task. To create such a zone, here’s what you’ll do:

D. Making the zone for the Postcodes
Zip codes, postcodes, or postal codes – whatever these area-wise codes are called in your country – could be added to one zone.
You must select the relevant option (as in the figure). After that, choose a country and fill in the postal codes that you want to add to the zone.

Advanced Flat Rate Shipping Methods
Boost your WooCommerce store’s revenue with flexible shipping options. Your business deserves the best!

How to Create Zone-based methods?
As you have learned to create different types of zones using this WooCommerce Plugin, half of the task is done already. Now, here’s the second half:
Part 1: Adding Method
To add a new method, click on: ‘Add New Shipping Method’.

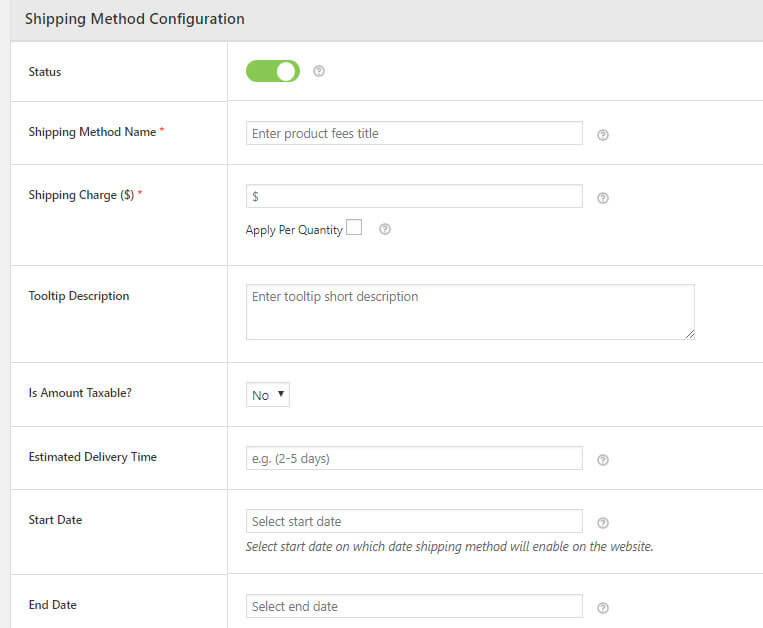
Once you click on this button, a form will appear [Form below].

Give an understandable name and a good tooltip description of your method so everyone can understand it. If you do this, your co-workers can easily understand the shipping charges for a particular product in your absence too.
Other fields like estimated time, starting date, ending date, etc., are to be filled out too.
Fill out the form and scroll down to add rules.
Part 2: Adding Rules to a Method
To add the rules corresponding to your method, you need to click on the option ‘Add Rule’. The section must be looking like this:

You may add one rule or multiple rules as needed.
By adding multiple rules, you can easily set the shipping charges for multiple products, not only for the states but for the countries as well. It means by using the Advanced Flat Rate Shipping Method, you can deliver products to your customers worldwide while charging them an adequate amount.
Now, as you must add a zone, simply choose ‘Zone’ from the drop-down, as done in the figure.

On the right side, you can fill in the zone’s name, which you created in the previous part of the tutorial.
If you require assistance in using the plugin or are wondering what the Advanced Rate Shipping Method for WooCommerce Plugin does, send your queries to us. Download it from the link above to use it for your e-commerce store.
Advanced Flat Rate Shipping Methods
Boost your WooCommerce store’s revenue with flexible shipping options. Your business deserves the best!
